https://shopliquidrubber.com/blogs/news.atomLiquid Rubber - Blogs2023-11-14T13:44:11-05:00Liquid Rubberhttps://shopliquidrubber.com/blogs/news/how-to-seal-your-concrete-patio-a-comprehensive-diy-guide2023-11-14T13:44:11-05:002024-03-10T20:50:15-04:00How to Seal Your Concrete Patio: A Comprehensive DIY GuideMichael Jon
In this comprehensive DIY guide, we will walk you through the step-by-step process of sealing your concrete patio using Liquid Rubber, a modern and effective solution.
]]>
If you have a concrete patio, you know how important it is to protect it from the elements. Over time, exposure to rain, sun, and temperature changes can cause your patio to crack and deteriorate. That's why it's crucial to seal your concrete patio to ensure its longevity and maintain its appearance. In this comprehensive DIY guide, we will walk you through the step-by-step process of sealing your concrete patio using Liquid Rubber, a modern and effective solution.
Liquid Rubber Polyurethane Deck Coating Gives you color options and smooth and textured options for those wanting some extra grip. It is incredibly easy to apply, making it ideal for DIY projects. It comes in a liquid form that can be brushed, rolled, or sprayed onto the surface of your patio. Unlike other solutions that require complex mixing or catalysts, Liquid Rubber provides a seamless and hassle-free application process.
Affordability and Reliability
Liquid Rubber offers excellent value for your money. It provides long-lasting protection against water damage, UV rays, and temperature fluctuations. By sealing your concrete patio with Liquid Rubber, you can extend its lifespan and avoid costly repairs in the future.
VOC-Free and Nontoxic
One of the significant advantages of Liquid Rubber is that it is VOC-free and nontoxic. This means you can apply it without worrying about harmful fumes or health hazards. Liquid Rubber is safe for both you and the environment, making it an eco-friendly choice for your concrete patio.
Identifying the Issue
Before you begin the sealing process, it's essential to identify any existing issues with your concrete patio. Look for cracks, chips, or areas where water pools after rain. These are signs that your patio is vulnerable to water damage and requires sealing. Additionally, check for any stains or discoloration that may need to be treated before sealing.
Preparation for Waterproofing
Proper preparation is key to ensuring a successful sealing process. Here's what you need to do:
Clean the Surface
Start by thoroughly cleaning your concrete patio with Liquid Rubber Deck & Patio Cleaner. Remove any dirt, debris, or loose particles using a broom or a pressure washer. Rinse the patio thoroughly and allow it to dry completely before moving on to the next step.
Repair Cracks and Imperfections
Inspect your patio for any cracks or imperfections. Use a concrete repair product or Liquid Rubber Sealant & Adhesive Caulking to fill in the cracks and level out any uneven areas. Follow the manufacturer's instructions for application and drying time. Once the repairs are complete, make sure the surface is smooth and even.
Test for Porosity
To determine if your concrete patio is porous and requires sealing, perform a simple water test. Sprinkle a few drops of water on the surface. If the water is quickly absorbed and darkens the concrete, it indicates porosity. If the water beads up and doesn't penetrate the surface, sealing may not be necessary.
Etch and Prime the Concrete
Prepare the surface for the application of the sealant using Liquid Rubber Concrete Etch. Etching the surface removes contaminants and minutely roughens the surface, as well as helping by neutralizing the PH of the concrete/masonry, which works to ensure proper and long-lasting adhesion. After this step, use a primer to prime the concrete surface using Multipurpose Primer to fully prepare the surface for the best possible adhesion.
Steps for Sealing Your Concrete Patio with Liquid Rubber
Now that you understand the benefits of using Liquid Rubber let's dive into the step-by-step process of sealing your concrete patio:
Application of Liquid Rubber
Once the surface is clean, etched, primed and prepared, it's time to apply the Liquid Rubber Polyurethane Deck Coating. Follow these steps to add a protective coating to your patio that is 10x stronger than conventional patio or deck paint:
Stir the Liquid Rubber thoroughly to ensure an even consistency.
Using a 3/8’’ (10mm) microfiber roller, apply Liquid Rubber Multi-Purpose Primer to the entire surface at a coverage rate of approx. 175 to 200 ft²/ga.
Pay special attention to cracks, joints, and areas prone to water penetration.
After applying the final coat of Liquid Rubber, allow it to cure completely. This may take several days, depending on the product and weather conditions. Once cured, your concrete patio will be protected from water damage, UV rays, and other external factors.
To maintain the longevity of your sealed patio, follow these tips:
Regularly clean the surface with a mild detergent and water.
Avoid using harsh chemicals or abrasive cleaners that can damage the sealant.
Periodically inspect the patio for any signs of wear or damage and reapply Liquid Rubber as needed.
Wrapping Up
Sealing your concrete patio is a crucial step in protecting it from the elements and ensuring its longevity. By using Liquid Rubber, you can achieve a seamless and reliable seal that will safeguard your patio for years to come. With its ease of use, affordability, and eco-friendly properties, Liquid Rubber is the go-to solution for DIYers looking to seal their concrete patio effectively. Follow the steps outlined in this guide, and you'll have a beautifully sealed patio that can withstand the test of time.
Ready to get started? Shop now and save using code BLOG15 -- and get 15% off today’s order
]]>
https://shopliquidrubber.com/blogs/news/preparing-for-the-colder-months-winterizing-decking-1012023-10-12T18:49:37-04:002024-03-10T20:49:18-04:00Preparing for the Colder Months: Winterizing Decking 101Michael Jon
As the weather begins to cool down, it's crucial to learn how to winterize your decking. Here's what you need to know to prepare your deck for winter.
]]>
As a homeowner, you are tasked with the maintenance and upkeep of your property. But an often overlooked area is the deck. Many of us appreciate the deck during the warmer months for barbecues, lounging, or simply enjoying the outdoors. But as the weather begins to cool down, it's crucial to learn how to winterize your decking. This process helps preserve its structural integrity and appearance through the harsh winter months.
Importance of Deck Winterization
Winterizing your deck is a crucial aspect of home maintenance. Without proper care, your deck could suffer from various issues such as:
Warping and cracking due to moisture
Wood rot from accumulated debris
Fading and discoloration due to harsh weather
Damage to furniture and fixtures left on the deck
By learning how to winterize your decking, you can prevent these problems and increase the lifespan of your deck. It's not just about saving money on potential repair costs—it's also about enjoying a beautiful and safe deck year-round.
Start Preparations Early
The best time to start winterizing your deck is in the late summer or early fall, before the weather turns harsh. At this point, you should inspect your deck closely for any signs of damage such as loose boards, protruding nails, or areas of decay.
Make sure you make any necessary repairs during this period. It's much easier to find and fix problems when the weather is still mild. Besides, tending to these issues early prevents them from escalating during the winter.
Cleanliness is Key
Once you've inspected and repaired your deck, the next step is to clean it thoroughly. This involves clearing away all furniture and outdoor items for a start. Then, sweep off any accumulated debris.
For a deeper clean, consider using Liquid Rubber Deck and Patio Cleaner. This product is designed just for your deck, it's nontoxic and is particularly useful for tackling stubborn stains or growths like mold, mildew, or fungus.
A pressure washer can also be handy for blasting away stubborn dirt in hard-to-reach areas. Just be careful not to damage the wood by using too high a pressure setting.
Trim Overhanging Branches
Trimming any overhanging branches is an important step in preparing your deck for winter because they can drop debris onto your deck, which can cause damage over time. Moreover, in the event of a snowstorm, heavy branches could break and fall onto the deck, causing significant damage.
Regular Maintenance
Even after winterizing your deck, it's important to maintain it regularly throughout the winter. This includes removing fallen leaves promptly to prevent them from rotting and damaging the wood. If snow accumulates on your deck, shovel it off as soon as possible to prevent moisture damage.
The Modern Day Option: Liquid Rubber
For those in the DIY community, a modern and effective option for deck protection is Liquid Rubber Polyurethane Deck Coating. It stands out for its ease of use, affordability, and reliability. Being VOC-free and non-toxic, it's a safe choice for both the user and the environment.
Liquid Rubber is a versatile product that can be applied to various surfaces, including your deck. It forms a waterproof barrier that protects your deck from moisture, thereby preventing issues like warping, cracking, and rot.
Winterizing your deck is a crucial part of home maintenance that can save you time, money, and stress in the long run. By following these steps, you can enjoy a beautiful, safe, and long-lasting deck throughout the year.
]]>
https://shopliquidrubber.com/blogs/news/restore-your-rv-roof2023-10-11T10:30:00-04:002024-03-10T20:49:11-04:00Restore Your Leaky RV or Camper Roof!Angie Schenk
The roof of your RV is an umbrella from the elements, ensuring your comfort and security as you head out on your adventures.
Instead of spending thousands of dollars on professional repairs, discover how you can easily and quickly tackle the job yourself!
Meet Michael, who faced a major roof leak in his camper, causing damage to the bathroom's interior.
Instead of resorting to other costly repair methods, Michael opted for Liquid Rubber RV Roof Coating – a durable solution that's not only cost-effective, but that's also easy to apply in less than a weekend.*weather permitting
The process is not much different than painting and the Liquid Rubber tech support team is ready to arm you with all the information you need to start and finish your projects yourself.
First, you will want to gather your materials and once you have all your supplies, you are ready to begin.
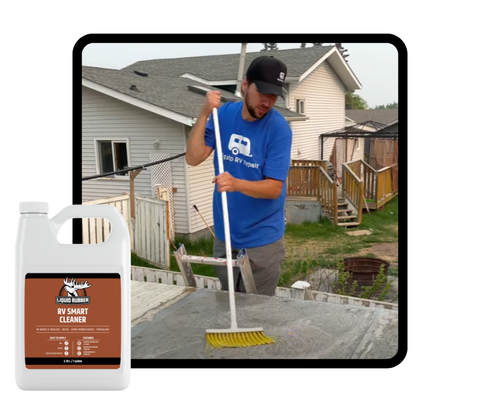
Prep is a priority, you will want to ensure your RV roof surface is clean and free of dirt, grease, and any debris. Liquid Rubber
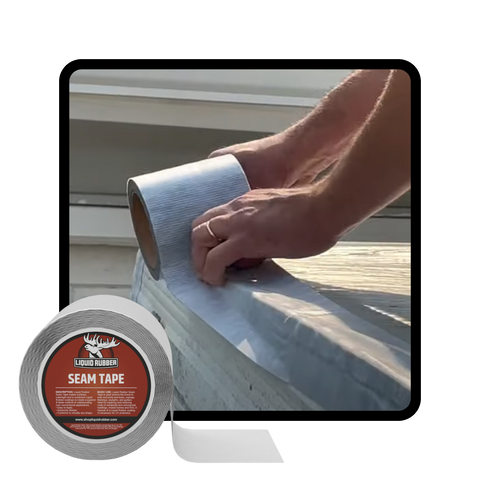
After cleaning the roof of your RV or camper, Seal around vents & seams, with Liquid Rubber Seam Tape and/or Liquid Rubber RV Lap Sealant. Ladder joints, brackets, cracks and crevices should all be taped or sealed with RV Lap Sealant.
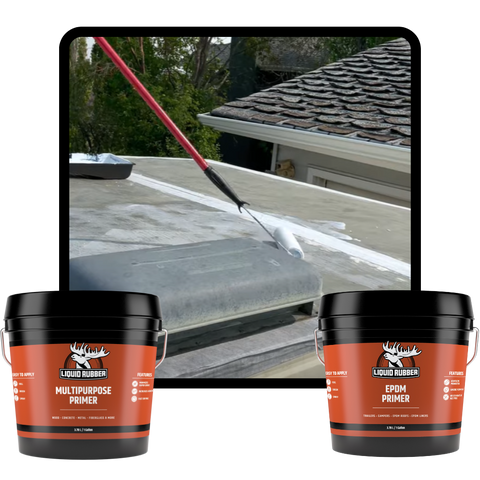
Prime the surface withLiquid Rubber EPDM Primer (or Multipurpose Primer). Using the right primer is crucial, so ensure you select the right primer for your roof type. If you aren't sure what material your RV/camper roof is made of, Liquid Rubber's tech support is always happy to help.
Once the primer is dry (tacky is ok), you're able to coat your RV with our RV Roof Coating. *Working in sections is easiest, for example: prime half then coat, then repeat.
For full application guidelines,click here for our Project guidewhich includes the coverage calculator, just so you know how much product you'll need to get the job done.
The end result is a durable, long-lasting, waterproof finish that has Michael anticipating those family adventures once more. The UV reflective coating will keep the inside of his camper cooler than ever before all summer!
For more about Michael Boyd and his family adventures, watch them restore this RV roof by clicking HERE.
"I went with liquid rubber because I had a major leak in the bathroom area. It was really easy to order, online & shipped right to my house. I got everything I needed for the project all at once. Mainly we wanted something environmentally friendly, not just for the environment but for my body, so that’s why we went with low VOC’s which is important to us.
We’ve had 3 or 4 major storms and everything is dry inside. That’s why we recommend Liquid Rubber."
Not sure if Liquid Rubber is right for you?Contact our tech supportand they can help answer your questions, and help select the right products for your project.
]]>
https://shopliquidrubber.com/blogs/news/how-to-use-liquid-rubber-sealant-for-waterproofing-rv-roofs2023-10-03T18:38:46-04:002024-03-10T20:49:24-04:00How to Use Liquid Rubber RV Roof Coating for Waterproofing RV RoofsMichael Jon
This article will provide you with a step-by-step guide on how to use liquid rubber sealant to fix cracked EPDM rubber roofing.
]]>
Liquid Rubber RV Roof Coating, has become a go-to solution for the DIY community looking to waterproof their RV roofs. Its ease of use, affordability, and reliability make it a top choice. Plus, it's VOC-free and nontoxic, making it a safe option for all users. This article will provide you with a step-by-step guide on how to use Liquid Rubber RV Roof Coating to fix & restore your roofing.
Understanding the Benefits of Liquid Rubber Sealants
Before we dive into the application process, let's first understand why Liquid Rubber RV Roof Coating is the best choice for your RV roof.
Easy to Apply
Liquid Rubber RV Roof Coating is incredibly user-friendly. Unlike some other waterproofing solutions, it doesn't require any complicated steps or specialized equipment. You can apply it with a simple paintbrush and roller.
Cost-Effective
When it comes to the cost, Liquid Rubber RV Roof Coatingis a winner. Not only is the product itself affordable, but you can also save on labor costs because you can easily do the job yourself.
Reliable
Liquid Rubber RV Roof Coating is known for its reliability. It creates a waterproof membrane that can withstand varying weather conditions and protect your RV roof from leaks.
Safe
What's more, Liquid Rubber RV Roof Coating is VOC-free and nontoxic. This means it's safe for both people and the environment.
Necessary Tools and Materials
Before starting the project, make sure you have all the necessary tools and materials. You'll need:
Liquid Rubber RV Roof Coating Kit
Paintbrush & rollers
Protective gloves
Masking tape
Clean cloth
Mild detergent
How to Apply Liquid Rubber RV Roof Coating: Step-by-Step Guide
Applying Liquid Rubber RV Roof Coating is a straightforward process. Here's what you need to know:
1. Prepare the Surface
Start by preparing the surface of your RV roof. Remove any loose debris and clean the surface with our RV Smart Cleaner. Make sure the roof is completely dry before proceeding to the next step.
2. Mask off the Area
Be sure to cover all cracks and seams with Liquid Rubber Seam Tape. For small areas around ladders or bathroom vents use our Liquid Rubber RV Lap Sealant. Use masking tape to mark off the areas where you will apply the sealant. This step helps ensure a neat and professional-looking result.
3. Apply the Primer & Sealant
Then prime the surface with the proper primer for your roof type. The primer may remain sticky after it cures, so work in manageable sections. Then use a paintbrush or roller to apply the Liquid Rubber RV Roof Coating to the prepared area.
4. Allow to Dry
Allow the sealant to dry completely. The drying time will depend on the specific product and weather conditions, so be sure to check the manufacturer's instructions.
5. Apply Additional Coats
In addition to this, apply additional coats of the sealant until you reach the final coverage rate. Most products recommend at least two coats for optimal waterproofing.
6. Remove the Masking Tape
Once the final coat of sealant has dried, carefully remove the masking tape. Your RV roof is now waterproof and ready to withstand any weather conditions!
Frequently Asked Questions about Liquid Rubber Sealants
Can I use Liquid Rubber Sealants on Other Surfaces?
Absolutely! Liquid Rubber RV Roof Coating is versatile and can be used on a variety of surfaces, including metal, fiberglass, and wood.
How Long Does Liquid Rubber Sealant Last?
The longevity of the sealants can vary depending on the conditions it is exposed to. However, under normal circumstances, you can expect it to last for several years before needing to reapply.
Can I Paint Over Liquid Rubber Sealant?
Liquid Rubber RV Roof Coating comes in white for maximum solar reflectivity. Because the coating remains flexible, standard paint may crack over time.
Final Thoughts
In conclusion, Liquid Rubber is a top-notch solution for waterproofing your RV roof. Its ease of use, cost-effectiveness, reliability, and safety make it a favorite among the DIY community. So why wait? Grab your Liquid Rubber RV Roof Coating today and give your RV roof the protection it deserves!
]]>
https://shopliquidrubber.com/blogs/news/how-to-winterize-your-pond-use-these-methods-to-properly-prepare2023-10-02T14:49:13-04:002024-03-10T20:50:49-04:00How to Winterize Your Pond: Use These Methods to Properly PrepareMichael JonIf you want to ensure their survival during the cold months, you need to take steps to protect them. Use this helpful guide toprepare your pond for colder weatherin advance.
]]>
The colder months of winter are just around the corner. This means that it’s time to start thinking about how to winterize your pond. As temperatures drop, the living conditions for your fish and plants change dramatically. If you want to ensure their survival during the cold months, you need to take steps to protect them. Use this helpful guide to prepare your pond for colder weather in advance.
Understanding Why Pond Winterization Is Crucial
Winterizing a pond isn't just about protecting your fish and plants; it's also about maintaining the overall health of your pond ecosystem. Freezing water expands and it’s this expansion can cause damage to any features in your pond or the pond liner, leading to costly repairs come spring. In addition, the reduced sunlight and lower temperatures can affect the biological processes within your pond, potentially causing harmful conditions for your fish and plants.
Topping the list of reasons for pond winterization is that you want to prevent the water from fully freezing. A solidly frozen pond can trap harmful gasses produced by decomposing organic matter (like leaves and dead plants) and prevent oxygen from reaching your fish. The trapped gasses can be toxic to fish and other aquatic life, while the lack of oxygen can cause them to suffocate.
Preparing Your Pond for Winter: The Basics
Before you begin the process of winterizing your pond, there are a few basic things you need to do. Start by cleaning your pond thoroughly. Remove any leaves, debris, or dead plants that have accumulated over the summer and fall months.
Next, check the health of your fish. Sick or stressed fish are less likely to survive the winter, so it's important to treat any diseases or parasites before the cold sets in.
Finally, adjust your feeding schedule. As temperatures drop, your fish's metabolism will slow down. This means they'll need less food. You’ll want to avoid overfeeding the fish during the colder months because this can lead to excess waste and that can also negatively affect water quality.
How to Winterize Your Pond: A Step-by-Step Guide
1. Clean Your Pond Thoroughly
The first step in winterizing your pond is to give it a thorough cleaning. Remove any leaves, debris, and dead plants that have accumulated. This will help prevent the build-up of harmful gasses during the winter and make it easier for your pond's filtration system to function effectively.
2. Check the Health of Your Fish
Before winter sets in, it's important to check the health of your fish. Sick or stressed fish are less likely to survive the winter months, so it's crucial to treat any diseases or parasites as soon as possible. If your fish appear to be in good health, it's still a good idea to add a broad-spectrum treatment to the water as a preventative measure.
3. Adjust Your Feeding Schedule
In colder weather, your fish's metabolism will slow down, and they'll require less food. As the temperature drops, gradually reduce the amount of food you're providing to prevent excess waste and preserve the quality of the water.
4. Install a Pond Heater or De-Icer
One of the most important steps in winterizing a pond is to prevent it from freezing solid. A pond heater or de-icer can help maintain a small area of open water, allowing for gas exchange and helping to keep your fish alive.
5. Protect Your Pond with Liquid Rubber
Protecting your pond liner from the harsh winter conditions is essential. To do this effectively, consider using a product like Liquid Rubber. Liquid Rubber is a modern day solution that offers a range of benefits. It's easy to use, reliable, and affordable.
Liquid Rubber can be applied to your pond liner to provide a protective, waterproof layer. It doesn’t emit harmful VOCs and it’s also nontoxic, making it safe for your fish and plants. What's more, it's incredibly durable and can withstand the freezing and thawing cycles of winter without cracking or peeling.
Ensuring Your Pond's Survival During Winter
Winterizing your pond is all about preparing for the worst. By taking steps to protect your fish, maintain water quality, and prevent freezing, you can ensure that your pond will not only survive the winter but thrive come spring.
Remember, a good winterization process isn't just about facilitating survival; it's about creating a healthy ecosystem that allows your pond to flourish year-round.
So, are you ready to winterize your pond? With a little preparation and the right products like Liquid Rubber, you can easily protect your pond from the harsh winter conditions.
As the world of DIY continues to grow, it's essential to stay informed about the latest strategies and products available. By understanding how to winterize your pond and implementing these practices, you can ensure the health and longevity of your pond and its inhabitants.
Remember, in the world of DIY, knowledge is power. So arm yourself with the right information, the best tools, and the passion to create a thriving pond that can withstand the challenges of winter.
Be sure to stay tuned for more insights and advice on managing your DIY projects, from pond winterization to home renovation, and more. Happy winterizing!
]]>
https://shopliquidrubber.com/blogs/news/how-to-winterize-your-rv-a-step-by-step-guide-for-everyone2023-09-27T15:37:37-04:002024-03-10T20:50:53-04:00How to Winterize Your RV: A Step-by-Step Guide for EveryoneMichael Jon
As fall gives way to winter, RV owners must take necessary precautions to protect their vehicles from potential damage caused by the harsh cold weather. Use this guide to learn how to winterize your RV.
]]>
As fall gives way to winter, RV owners must take necessary precautions to protect their vehicles from potential damage caused by the harsh cold weather. Specifically, winterizing your RV's plumbing system is a crucial task that can save you significant time and money come springtime. However, winterizing your RV does not only involve the plumbing system, but also the automotive portion of the RV, which we'll cover in this detailed guide.
Winterizing Your RV
Winterizing your RV is an important part of RV maintenance that shouldn’t be overlooked. When temperatures plummet into the low 40s or high 30s, the water in your RV's lines and pipes can freeze. Once this water freezes, it expands, potentially leading to cracked pipes—a costly and time-consuming repair. To avoid this headache, it's prudent to winterize your RV every year as soon as temperatures begin to drop.
What You'll Need to Winterize Your RV
Gathering the right materials is key. Here's what you'll likely need:
Antifreeze (around two to three gallons)
Water pump converter kit
Water heater bypass kit
A tank cleaning wand and flushing system
Tools for removing drain plugs, such as a socket wrench or power drill
Some new inline water filters (optional)
A flashlight for better visibility (optional)
Steps to Winterize Your RV
Step 1: Remove Inline Water Filters
Since antifreeze will be pumped through your water system, you should remove any installed inline water filters. This ensures they remain clean and ready for use when you reinstall them for your springtime adventures. If the filters are due for a replacement, this is an excellent time to do so.
Step 2: Flush Grey/Black Water Tanks
At your local dump and fill station, you can pay a small service fee to dump all the gray and black water. Allow extra time to ensure that the tanks are completely emptied. After you have emptied them, make sure you flush each tank thoroughly. If your RV doesn't have a built-in flushing system, use a cleaning wand or an external flushing system to clean out the tanks.
Step 3: Empty the Water Heater
The next step is to empty your water heater. First, make sure that you’ve turned off the heat source and allowed ample time for the water to cool. Next, you can easily use a socket wrench to open up the pressure release and allow the water to drain. Make sure to turn the water pressure back on afterwards and flush out any sediment and residual residue for a few minutes.
Step 4: Bypass the Water Heater
If your RV has a water heater bypass feature built-in, now is the time to activate it before you add antifreeze. If you do not have this feature, you’re going to want to have a bypass kit installed before winter.
Step 5: Empty the Low Point and Fresh Tank Drains
Make sure you have turned down the water pressure before you complete this RV winterization step. Remove the plugs to drain and make sure to close any faucet and low point drains after you’ve completed this task.
Step 6: Connect the System to Antifreeze
Make sure you follow any manufacturer specifications here -- which generally include using a water pump converter kit or an existing water intake line to add antifreeze to your RV’s internal system to protect it against the cold winter weather ahead.
Step 7: Open All Valves and Faucets
Begin close to your water pump, opening hot and cold faucets until you start to see the antifreeze coming out. Do this for any faucet or water valve in your RV including the shower until you are certain that antifreeze has passed through them all.
Step 8: Flush the Toilet
Now it’s time to do the same with any toilets, flushing until you see the antifreeze. This ensures that the toilet and septic system are winterized.
Step 9: Pour Antifreeze Down the Drains
Now you want to protect your drains. Simply pour one or two cups of antifreeze down every drain line in your RV to ensure each line is protected against freezine.
Step 10: Final Preparations
Finally, make sure your water heater is completely turned off and that you’ve closed all faucets. Your RV's water system should now be ready for winter storage.
Additional Tips for Winterizing Your RV
While the steps above primarily focus on winterizing your RV's water system, there are a few additional tasks that should be completed to fully prepare your RV for winter storage:
Clean the Interior: Leaving food or waste behind could attract pests.
Cover Your RV: If your RV will be stored outside, consider using a breathable cover to protect it from the elements.
Check for Pests: Check your RV for any signs of pests and use repellents as necessary.
Check Seals and Seams: Inspect your RV's seals and seams for any damage. Repair as needed to prevent water damage.
Let's Wrap This Up
Learning how to winterize your RV is an essential skill for any RV owner. By following the steps outlined above, you can ensure your RV is well-protected from the harsh winter weather, saving you time, money, and stress when it's time to hit the road again.
So, as the temperatures start to drop, make sure you're prepared to winterize your RV and give it the care it needs during the off-season. By taking the time to properly winterize your RV, you're investing in the longevity and performance of your vehicle for the many adventures that lie ahead. Safe travels!]]>
https://shopliquidrubber.com/blogs/news/top-reasons-to-secure-your-next-rv-journey-with-liquid-rubber-rv-roof-sealer2023-09-14T13:46:12-04:002024-03-10T20:49:08-04:00Top Reasons to Secure Your Next RV Journey with Liquid Rubber RV Roof CoatingMichael Jon
When setting out on another RV adventure, the last thing you want to have to worry about are leaks and water damage. Thankfully, a quality roof sealer for RVs, like Liquid Rubber RV rubber roof sealer, can offer an ideal solution. It provides an excellent protective shield for your RV roof, ensuring a worry-free journey.
]]>
When setting out on another RV adventure, the last thing you want to have to worry about are leaks and water damage. Thankfully, a quality roof sealer for RVs, like Liquid Rubber RV Roof Coating, can offer an ideal solution. It provides an excellent protective shield for your RV roof, ensuring a worry-free journey.
Why Choose Liquid Rubber RV Roof Coating?
RV rubber roof sealers offer several advantages that make them a top pick for RV owners. Here's what you need to know:
1. Cost-Effective
One of the most striking benefits is its cost-effectiveness. Compared to other roofing materials like aluminum or fiberglass, rubber roof sealers are significantly more affordable. They offer a durable and reliable solution without burning a hole in your pocket.
2. Lightweight
RV rubber roof sealers are lightweight, which makes them an excellent choice for RVs. The reduced weight helps in improving fuel efficiency and makes maneuvering the RV easier.
3. Low Maintenance
Another advantage of using a rubber roof sealer is its low maintenance properties. They require minimal care and upkeep, saving you both time and money in the long run.
4. Seamless Application
The application of a Liquid Rubber roof sealer is seamless, providing a single, unified layer of protection. This reduces the chances of leaks or damage that can often occur at the seams of other roofing materials.
5. Eco-Friendly
Many RV rubber roof sealers, like those from Liquid Rubber, are environmentally friendly. They are nontoxic, VOC-free and won't harm the environment, you or your pets.
6. Superior Waterproofing
The waterproofing ability of RV rubber roof sealers is top-notch. They create a water-resistant barrier that protects your RV roof from leaks, rain, and other weather-related threats.
The Star of the Show: Liquid Rubber RV Roof Coating
With numerous options available in the market, one product stands out for its superior quality and performance - the Liquid Rubber RV Roof Coating. Here's why it should be your go-to product:
1. Unmatched Flexibility
The Liquid Rubber RV Roof Coating is extremely flexible. This means it can stretch and contract with your RV as it moves, providing an unbeatable level of protection.
2. Easy to Apply
Liquid Rubber RV roof sealant is incredibly easy to use. It can be applied with a brush, roller, or sprayer, making it a popular choice among DIY enthusiasts.
3. Superior Coverage
This RV roof coating provides excellent coverage. We recommend a multiple coat application to build the thickness of the membrane.
4. Environmentally Friendly
Liquid Rubber's RV Roof Coating is VOC-free and non-toxic, making it an eco-friendly choice. It's safe for both you and the environment.
5. Renowned Brand
Liquid Rubber is a well-known brand, trusted by thousands of RV owners around the world. Their products are known for their high quality and reliable performance.
Protect Your RV Roof with the Best
Choosing the right RV rubber roof sealer is crucial for the longevity and performance of your RV roof. With its remarkable benefits and easy application, Liquid Rubber's RV Roof Coating makes an excellent choice. It's a reliable, cost-effective, and eco-friendly solution that ensures your RV roof stays in top-notch condition. Isn't that what every RV owner wants?
Tips for Applying RV Roof Coating
Applying an RV rubber roof sealer is a straightforward process, especially with user-friendly products like those offered by Liquid Rubber.
Here are some important tips to keep in mind:
Clean the Roof: Before applying the sealer, ensure your RV roof is clean and free from debris. This allows the sealer to adhere properly to the roof.
Check for Damage: Inspect your RV roof for any signs of damage. If you find any cracks or leaks, use a roof repair product to fix them before applying the sealer.
Apply the Sealer: Use a brush or roller to apply the sealer evenly over the roof. Remember, with Liquid Rubber products, follow the coverage rate closely to ensure proper thickness.
Allow to Dry: After applying the sealer, give it ample time to dry. The drying time can vary depending on the product and weather conditions, so be sure to check the product instructions.
Liquid Rubber RV Roof Coating is an excellent investment for every RV owner. It offers superior protection, is easy to apply, and comes with a host of benefits. What's more, with products like the Liquid Rubber RV Roof Coating, you can ensure your RV roof stays in top condition for years to come. So, before you hit the road for your next adventure, make sure your RV roof is well-protected with a quality RV roof sealant!
]]>
https://shopliquidrubber.com/blogs/news/revive-your-deck-with-liquid-rubber2023-08-22T17:32:18-04:002024-03-10T20:56:16-04:00Revive Your Deck with Liquid RubberAngie Schenk
You should be proud of your deck! It is a feature not just for BBQs and enjoying the outdoors, but a focal point on the outside of your home. Your deck can either add to the aesthetic of your home or become an eyesore.
Repainting a deck is a common way to spruce up a worn deck or patio. But it is not the only solution.
John faced this same dilemma earlier this year. His deck was worn, aged and bland
Rather than using standard deck paint, John found Liquid Rubber. Liquid Rubber Polyurethane Deck Coating is 10x stronger than deck paint & offers a durable solution to protect your decks and patios.
The process is not much different than painting. And the Liquid Rubber tech support team is ready to arm you with all the information you need to finish your projects yourself.
First, you will want to gather your materials and once you have all your supplies, you are ready to begin.
Prep is priority, you will want to ensure your surface is clean and free of dirt, grease, and any debris. Liquid Rubber Deck & Patio Cleaner gets the job done!
When coating his deck, John wanted to make sure the results will last for years to come. Talk to Tech support to see if your project needs a primer, because if you do, you won't want to skip this step!
After Priming the surface with Liquid Rubber Multipurpose Primer, the deck is ready to be coated with Polyurethane Deck Coating. With 5 colors to choose from, and 2 finishes; smooth and textured, you'll be able to find the right look for your deck or patio.
For full application guidelines click here for our Project guide which includes the coverage calculator. So you know how much product you'll need to get the job done.
The end result is a durable, long-lasting finish where John is now excited to entertain his family and friends again. Not to mention the visual value it adds to the exterior of his home.
John chose to coat the deck in the smooth finish and the stairs in textured.
"My aged deck was embarrassing to look at. I live in a beautiful home, and my deck was anything but!
I was looking for a stronger paint, that I wasn't even sure existed. After some research and chatting with tech support, I decided to give Liquid Rubber a shot.
The results don't lie, my deck looks better than brand new, and the support before and during exceeded my expectations!
The application waseasy, cleanup was a breeze... I mean look at this deck!"
- John Sanders
Not sure if Liquid Rubber is right for you? Contact our tech support and they can help answer your questions, and help select the right products for your project.
]]>
https://shopliquidrubber.com/blogs/news/revitalize-your-rv-how-to-reseal-your-rv-roof-vents-with-liquid-rubber2023-08-15T13:47:13-04:002024-03-10T20:56:06-04:00Revitalize Your RV: How to Reseal Your RV Roof Vents with Liquid RubberMichael Jon
Join us as we deliver some helpful, step-by-step guidance on using the best RV roof sealant, Liquid Rubber RV Roof Coating, so you can learn how to reseal RV roof vents using this product.
]]>
It's that time of the year again when we prepare our recreational vehicles (RVs) for the camping season. Among the essential preparation tasks is checking and resealing our RV roof vents. Join us as we deliver some helpful, step-by-step guidance on using the best RV roof sealant, Liquid Rubber RV Roof Coating, so you can learn how to reseal RV roof vents using this product.
Why is Resealing Necessary?
Over time, the sealant on your RV roof vents can crack and deteriorate, causing potential leaks. Regularly checking and resealing these vents is crucial for maintaining the health of your RV and ensuring a hassle-free journey.
Enter Liquid Rubber RV Roof Coating - a VOC-free, non-toxic, and highly effective solution. This environmentally friendly coating transforms into a waterproof membrane when cured, providing your RV roof with the armor it needs.
Why Choose Liquid Rubber?
There are several reasons why Liquid Rubber is the obvious choice when it comes to repairing RV roofs and extending their lifespan.
Ease of Use: Liquid Rubber RV Roof Coating is easy to apply, whether you're a seasoned RV owner or a newbie.
Affordability: The cost of Liquid Rubber is competitive, especially when considering its quality and the protection it provides and the cost comparison between resealing your RV roof and replacing it.
Reliability: Liquid Rubber stands up to the elements, offering long-lasting protection against leaks.
Environmentally Friendly: Liquid Rubber is VOC-free and non-toxic, perfect for the eco-conscious traveler.
Prepping for the Task
Before you start, you'll need to gather a few supplies so you can prepare your RV roof for the repair.
Apply Seam Tape to all seams at the perimeter and around protrusions (vents, skylights, etc.). Be sure to overlap separate pieces of Seam Tape by at least 1 inch.
3. Prime the Roof
Apply the EPDM Primer to the roof, focusing on the detail areas (not the Seam Tape). Allow the Primer to dry until it is tacky.
4. Apply the Coating
Once the Primer is dry, apply a heavy coat of Liquid Rubber RV Roof Coating over the Seam Tape, extending at least 1 inch beyond the edges of the Seam Tape. Allow the Coating to dry completely.
5. Apply Additional Coats
Apply additional coats of the RV Roof Coating until you reach the desired thickness. Allow each coat to dry thoroughly before applying the next.
6. Inspect and Protect
Once you've applied the final coat, inspect the roof for any pinholes, blisters, voids, or thin spots. If you find any, repair as necessary using additional Coating.
Wrapping Up
Resealing your RV roof vents is a necessary task that can save you from expensive repairs down the road. With the right product and a little elbow grease, you can ensure your RV stays in top-notch condition. Liquid Rubber RV Roof Coating is an excellent choice for this task, offering ease of use, affordability, and superior protection.
For more tips and advice on maintaining your RV, check out our other articles. Safe travels! Now that you've successfully resealed your RV roof vents, it's time to hit the road and enjoy your journey, knowing that your RV is protected from leaks!
Ready to shop and get started on your next DIY project? Use code BLOG15 and get 15% off your next order right now!
]]>
https://shopliquidrubber.com/blogs/news/your-diy-guide-on-how-to-waterproof-basement-walls-using-liquid-rubber2023-08-02T15:16:52-04:002024-03-10T20:48:35-04:00Your DIY Guide on How to Waterproof Basement Walls using Liquid RubberMichael JonA wet basement can lead to a host of problems, such as mold growth, structural damage, and decreased property value. While there are many ways to tackle this issue, one of the most effective methods is to learn how to waterproof basement wallsfrom the inside.
]]>
Waterproofing your basement is a necessary step in home maintenance that can save you from potential water damage. A wet basement can lead to a host of problems, such as mold growth, structural damage, and decreased property value.
While there are many ways to tackle this issue, one of the most effective methods is to learn how to waterproof basement walls from the inside using Liquid Rubber.
Waterproofing: A Preventive Measure for Your Basement
Water infiltration through cracks in the foundation or walls
Improperly installed windows that prevent water from draining out
Inadequate drainage system, causing rainwater to pool around the foundation of your home
If you suspect any of these issues, it's advisable to have an inspection done by a qualified professional before attempting to waterproof your basement.
The DIY Approach to Waterproofing Your Basement
While calling in professionals is always an option, it can be an expensive one. Fortunately, you always have DIY options with Liquid Rubber. We provide products that are carefully designed to help you waterproof your basement yourself. They are easy to use, affordable, and most importantly, reliable.
Preparing Your Basement for Waterproofing
The first step in waterproofing your basement is to prepare the area. This involves a thorough cleaning to ensure the sealant can properly adhere to the surface. Here's what you're going to want to do:
Remove existing coatings: If there are any existing coatings on your basement flooring or walls, these will need to be removed. You can use methods such as paint remover or sandblasting to do this.
Clean the foundation and walls: Ensure that the foundation and walls are free from dirt, dust, and mold. A solution of bleach and water (12 ounces of bleach to every gallon of water) can be used to clean moldy areas. Once cleaned, rinse the areas with warm water and allow them to dry completely before applying the sealant.
Seal any holes or cracks: Small cracks and holes in the foundation can be filled using hydraulic cement. This synthetic cement sets rapidly and is easy to apply. Use a trowel to apply the cement to the affected areas and wipe away any excess.
Apply the Liquid Rubber Multi-purpose Primer: Using a nylon bristle brush or a nap roller, apply the primer to the basement walls. Make sure to use even strokes and cover the entire surface. Allow the primer to dry for 1-2 hours before applying the top coats.
Apply the sealant to the walls: Once the surface is primed, it's time to apply the sealant to the interior basement walls. For the best results, apply several heavy coats to create a waterproof membrane.
Sealing Openings to Windows & Doors
To ensure a completely waterproof basement, don't forget to seal the areas around your doors and windows. You can use Liquid Rubber's Sealant and Adhesive for this purpose. Just make sure to follow the product's instructions for effective use.
A Word of Caution
While waterproofing your basementyourself can save you money, it also requires a fair amount of work and attention to detail. If you're not comfortable with DIY projects or if your basement has serious water damage, it's best to hire a professional to get an inspection and assess any potentially serious issues and correct them first.
Conclusion
Learning how to waterproof basement walls doesn't have to be a daunting task. With the right products and a little bit of effort, you can protect your basement from water damage and ensure it remains a dry, usable space. So, roll up your sleeves, dare to DIY differently, and get to work! You'll be glad you did when you see the results.
]]>
https://shopliquidrubber.com/blogs/news/the-ultimate-guide-on-how-to-coat-over-a-duradek-or-vinyl-deck-with-liquid-rubber2023-07-25T18:12:26-04:002024-03-10T20:48:55-04:00The Ultimate Guide on How to Coat Over a Duradek or Vinyl Deck with Liquid RubberMichael JonMore]]>
Can Liquid Rubber be used on a vinyl or Duradek surface to improve longevity and restore the deck? The short answer is: YES!
To help you make an Informed decision on how to handle a weathered, vinyl sundeck -- rely on this Guide to make up your mind…
And to learn the necessary steps you’ll need to take for the desired outcome of this popular DIY project.
Understanding the Challenges of Painting a Vinyl Deck
One of the greatest benefits to having a vinyl deck is that, unlike wooden decks, you don't need to stain or paint it. But because of the PVC make-up of vinyl decking, paints and stains struggle to adhere to this surface long term if at all.
If you've ever owned a wooden deck, you know how fickle a coat of paint is, even on this rough, porous surface. A painted wooden deck requires a redo every couple of years at best.
Vinyl is about the most inhospitable surface that paint could encounter: smooth, horizontal, and non-porous. For this reason, painted vinyl has a short life expectancy; because the painted deck quickly flakes off in the high-traffic areas, it will leave your deck looking worse than before.
What's more, paint is not a waterproofer. If your vinyl deck is over living space or if you're relying on it in any way to keep water from penetrating to below, paint is going to disappoint you.
Exploring the Option of Coatings
Often confused with "paint," waterproof coatings are a viable option for changing the appearance of your vinyl deck. These two materials are similar in that they are liquid, pigmented, and applied with a roller, but that's about where the similarities end.
Coatings are multilayer waterproofing systems that rely on sophisticated chemistry to create effective adhesion and a reliable waterproof membrane. These properties are what make coatings like Liquid Rubber the most ideal solution for coating over Duradek or vinyl decking.
Ideal Conditions for Applying Liquid Deck Coatings
Make sure you plan out your application days. This is important because liquid deck coatings must be applied in ideal conditions. These consist of: dry, moderate temperatures without hot, direct sunlight. Poorly suited weather can cause a coating to fail, causing bubbling or peeling shortly after application. These inconsistencies (and any others in your deck that may not be obvious currently) will be visible even after reapplication.
Reliability of Your Waterproofing
Another thing you will want to consider is that your waterproofing is only as reliable as your substrate. A popped nail, failed seam, or structural failure won't be fixed by a coating. A liquid-applied membrane can extend the life of your vinyl deck membrane and improve aesthetics, but it shouldn't be relied on to fix a leak or larger issue that may be at play.
When to Consider Coating Your Vinyl Deck
There are a few circumstances where a deck coating might be your best option. Let's take a look at a few common situations:
When the cost to remove and replace a vinyl deck is prohibitively expensive or overly technical.
When you're simply looking to change up the color or design of your deck vinyl.
If you want to add some additional texture or stain resistance.
The vinyl sheet membrane breaks down over time.
The seams where it's joined together come apart, resulting in rips and tears which are hard to patch and usually result in replacing the whole vinyl sheet at a cost of $25 per sq. ft.
When it comes to removing and reinstalling a vinyl membrane, siding and exterior doors should be removed and replaced as well to ensure waterproofing. This isn't always an option. The good news is that a reliable liquid deck coating can solve a range of problems and only costs $3-4 per sq. ft.
Deciding Whether to Paint Your Vinyl Deck
Most home maintenance decisions can't be resolved with one simple article, but we're here to help. If you have more questions about updating your vinyl sundeck, please give us a call or use the Contact Us form. Our deck experts are committed to helping you make the best informed decision for your needs.
Understanding Liquid Decking
Liquid decking goes by many names: deck coating; roll-on membrane; liquid rubber; and liquid-applied membrane. While its title varies, its purpose and benefits are clear: Liquid decking seals your deck, creating a waterproof, safe, and easy to clean surface.
Composition of Liquid Decking
Generally, liquid decking is made of polyurethane, with optional pigment and texture added. Polyurethanes are naturally flexible, making them scratch resistant and accommodating to large temperature fluctuations. With natural UV inhibitors, this material stands up well to sunlight. Plus, some liquid decking products offer additional beneficial features, such as algae and mildew resistance.
How Liquid Decking Works
Liquid decking is typically applied to a smooth wood surface but can also be applied to Duradek and vinyl to restore the surface and enhance longevity. To use liquid decking, first, the surface of the deck must be cleaned and leveled.
To ensure adhesion and flexibility, an epoxy primer is used under a polyurethane topcoat. Epoxy is much harder than polyurethane, but effectively seals and binds to various substrates and the polyurethane.
The resulting combination is a durable, flexible, non-porous, well-bonded, waterproof membrane. And you can even choose to give your deck a colorful makeover by using a colored application that suits the style of your home.
Comparing Liquid Decking to Other Types of Decking
Liquid decking is a smart option for homeowners looking to waterproof their deck and those who want a low-maintenance solution. It's easy to clean, and easy to repair - where vinyl decking often needs a noticeable patch over damaged areas, liquid decking can be spot applied with a top coat. Plus, liquid decks are seamless, reducing the risk of water leaks.
Can You DIY Liquid Decking?
While it has numerous benefits, liquid decking requires specific conditions for application. Direct sunlight, excessive moisture, and cold temperatures complicate adhesion and curing. By example, on the West Coast, liquid decking is best installed during summer months.
Many homeowners may choose to take the project on themselves and DYing will save you money upfront. And, there are dozens of products available at hardware stores for waterproofing your deck making it hard to pick and choose the right one for your application. This guide will help you make a well informed decision that enables you to harness your inner DIY spirit.
Liquid Rubber Polyurethane Deck Coating
Liquid Rubber Polyurethane Deck Coating is designed to be 10 times stronger than a traditional deck coating. It delivers a hard waterproof surface to keep your property in pristine condition by providing a durable protective layer that helps you protect your surfaces and preserve your property for years to come.
Popular Uses of Polyurethane Deck Coating
Polyurethane Deck Coating provides a durable protective layer to deck surfaces. Here are other common uses for Polyurethane Deck Coating:
Decks
Concrete
Wood Walkways
Fences
Baseboards
Plywood Surfaces
Indoor/Outdoor Floors
And More
Applying Polyurethane Deck Coating
Apply minimum final thickness of 1 gallon per 50 sq ft (4.6 sq m). It should require around 3-4 heavy coats. High traffic areas and porous substrates require 1 gallon per 30 sq ft (2.8 sq m).
Liquid Rubber Cool Foot Deck Coating
Liquid Rubber Cool Foot Deck Coating is a high-performance, acrylic, elastomeric coating that reduces heat transfer by up to 35% compared to regular paint. The specialized formula cures into a durable, seamless, colored waterproof membrane. Contains no solvents, is non-toxic, VOC-free, and is non-flammable. The cured membrane has excellent solar reflectivity and UV stability.
This elastomeric coating uses glass bead technology to provide a coating that cools the surface better than the competition. Use on decks, railings and other contact surfaces for enhanced comfort and protection.
Apply minimum final thickness of 1 gallon per 50 sq ft (4.6 sq m). It should require around 3-4 heavy coats. High traffic areas and porous substrates require 1 gallon per 30 sq ft (2.8 sq m).
Liquid Rubber Application Guide for Vinyl Deck
Liquid Rubber Deck Coatings offer an easy to DIY brush-on/roll-on, high-performance, solution for your Duradek/Vinyl Deck. Liquid Rubber Cool Foot Deck Coating will reduce heat transfer by up to 35% compared to regular paint and it also provides superior abrasion resistance and is available in both a smooth and a textured version (for added slip resistance).
These deck Coatings cure into durable, seamless, attractive waterproof membranes that contain no solvents, and are non-toxic. Your cured membrane will have excellent solar reflectivity, UV stability and will remain color steadfast for years.
Both products are available in a variety of colors and can also be applied to sheet vinyl, fiberglass, and other decking materials.
Applying the Coating
You should apply the coating when the temperature is above 10˚C/50˚F (including overnight). Using a 3/8’’ (10mm) microfiber roller, apply Liquid Rubber Multi-Purpose Primer to the entire surface. For edges, corners and between wood boards, apply using a nylon/ polyester brush.
Allow the primer to dry until dry to the touch (approx.1-2 hours). Apply your selected Liquid Rubber Deck Coating when air and surface temperatures are between 10-30°C (50-86˚F). Avoid applying in high humidity over 80% or direct, intense sunlight.
Inspect for pinholes, blisters, voids, thin spots, or other defects. Repair as necessary. Allow 72 hours after the last coat for light foot traffic. Allow 5-7 days after the last coat before placing furniture on the coating.
Clean Up
Remove tape while the coating is wet and close the container to secure the leftover product. If spillage occurs, soak up as much material as possible with rags. Clean immediately with soap and water. If the spill is dried, scrape off as much as possible with a razor or scraper. Use mineral spirits to weaken the product and an appropriate tool such as a wire brush or grinder to mechanically remove.
Conclusion
Coating over a Duradek or a vinyl deck is possible with the right products and preparation. Liquid Rubber offers a range of coatings designed to waterproof and protect your Duradek or vinyl deck surface.
Now that you know you have options… dare to DIY differently with us! Shop now and save 15% off your next order using blog code BLOG15
]]>
https://shopliquidrubber.com/blogs/news/what-is-the-best-product-to-seal-an-asphalt-driveway-why-driveway-restore-is-the-solution2023-06-27T15:05:08-04:002024-03-10T20:48:41-04:00What is the Best Product to Seal an Asphalt Driveway? Why Driveway Restore is the SolutionMichael JonMore]]>
The visual appeal of a home is significantly influenced by the state of the driveway. It's an investment that enhances the aesthetics and value of your home. So, what is the best product to seal an asphalt driveway? The answer is resoundingly clear: it's Liquid Rubber's Driveway Restore. This remarkable driveway sealer has revolutionized driveway maintenance, offering an affordable, user-friendly, and reliable solution for DIY enthusiasts. But why is it considered the best driveway sealer? Let's dive on in.
Liquid Rubber Driveway Restore: A Closer Look
Liquid Rubber Driveway Restore is an innovative water-based compound specifically designed to breathe new life into aging, weather-beaten driveways. It's not only an effective solution for sealing existing cracks but also adds an additional layer of protective coating. This environmentally-friendly product is non-toxic and VOC-free, which means it's safe for your family, pets, and the environment.
One of the standout features of this sealer is its ability to resist weathering and the strong UV rays. This durability makes it an excellent choice for extending the life of your driveway, offering a new lease on life to your weathered and cracking asphalt.
Why Should You Opt for Driveway Sealing?
Replacing a deteriorating driveway can be an expensive affair. The cost per square foot can range significantly, and that’s before factoring in the removal of the existing driveway. In contrast, using a cost-effective rubber driveway coating like Liquid Rubber's Driveway Restore can prolong the life of your driveway, sealing any cracks, and preventing further damage. It's a cost-effective way to evade the steep cost of a complete replacement.
If you've noticed cracks in your driveway, they are likely caused by weather-induced expansion and contraction of the asphalt. Over time, this cycle can lead to cracks, which are further worsened by moisture infiltration. Water can erode the driveway, causing cracks to widen and propagate.
Here's where Liquid Rubber Driveway Restore jumps in as your driveway's savior. It prevents existing cracks from widening by filling them with a waterproof compound. In addition to this, it coats the entire surface, giving your driveway a fresh, robust look. It conceals existing flaws and essentially rejuvenates your driveway for years to come, all at a fraction of the cost of replacement.
How to Apply Liquid Rubber Driveway Restore
Before starting your driveway resealing project, ensure you have the necessary tools and materials. Liquid Rubber Driveway Restore is typically available in large buckets and can be applied using a squeegee or a special type of broom. You'll want to check the weather first to ensure you have a few days of sun ahead before starting this project. Here's a step-by-step guide on the best way to reseal a driveway using this product:
Preparation: Begin by cleaning the driveway thoroughly. Use a pressure washer to remove all dirt, debris, oils, staining, and other elements. You can use Liquid Rubber Deck & Patio Cleaner for an effective cleanup. After cleaning, allow at least 24 hours for the surface to dry before applying the sealer.
Crack Filling: For larger cracks, you'll need to use driveway caulking. These come in large caulking canisters and can be easily applied to fill any cracks. Be sure to remove any excess caulking after application for a smooth exterior finish.
Sealant Application: Pour out the sealant and spread it evenly across your driveway using a squeegee or broom. Ensure each stroke has an adequate amount of product for a thick outer coating. After allowing the first coating to dry for at least 4 hours, you can reapply to add a second coating and additional protection.
Curing: Let the sealant cure for at least 48 hours before parking or walking on the driveway.
Lets Wrap This Up!
Liquid Rubber Driveway Restore is the ultimate solution for your DIY home improvement needs. It offers an affordable, reliable, and easy-to-use means to restore your driveway to its former glory. What's more, it's safe for the environment and your family, making it a win-win solution for all your driveway maintenance needs.
So, if you've been wondering what is the best product to seal an asphalt driveway, you now have your answer. With Liquid Rubber Driveway Restore, you can seal, protect, and enhance your driveway, adding years to its lifespan and improving its aesthetics.
So why wait? Give your driveway the makeover it deserves with Liquid Rubber Driveway Restore today!
Shop and save on your next project. Use code BLOG15 to save 15% off your next order today!
]]>
https://shopliquidrubber.com/blogs/news/unleashing-the-power-of-liquid-rubber-unlocking-the-best-waterproofing-solution-for-your-basement2023-06-21T15:53:31-04:002024-03-10T20:48:44-04:00Unleashing the Power of Liquid Rubber: Unlocking the Best Waterproofing Solution for Your BasementMichael Jon
When it comes to maintaining a dry and damage-free basement, homeowners and DIY enthusiasts have often grappled with the question: "What is the best waterproofing solution for my basement?" The answer is surprisingly simple, and increasingly popular – Liquid Rubber.
Liquid Rubber technology has revolutionized the world of basement waterproofing with its ease of use, affordability, reliability, and eco-friendly attributes. This article aims to provide an in-depth exploration of why liquid rubber has become the go-to waterproofing solution, offering insights into its application, advantages, and how it stands out from traditional waterproofing methods.
Liquid Rubber: A Detailed Introduction
Liquid rubber is a by-product of bitumen processing, featuring a blend of polymers, stabilizers, and other modifying additives. This unique composition allows liquid rubber to offer high-quality waterproofing advantages, making it an ideal choice for homeowners and DIY enthusiasts alike.
Why Choose Liquid Rubber for Basement Waterproofing?
There are numerous reasons why more and more DIYers are turning to liquid rubber for their basement waterproofing needs. Here are some of the key advantages of using liquid rubber, highlighting why it's the best solution for your basement:
Seamless Application: Unlike other waterproofing systems, liquid rubber forms a seamless membrane after application, eliminating weak points and potential leak sources.
Exceptional Adhesion: Liquid rubber boasts 100% adhesion to the base, but adhesion can be further strengthened by using our Liquid Rubber Multi-purpose Primer, prior to the coating.
Impressive Flexibility: With a coefficient of stretching ranging between 600% and 800%, liquid rubber can withstand the shrinking and expansion of your building or structure without tearing or diverging, making it ideal for dynamic nodes.
Eco-friendly and Safe: Liquid rubber is non-toxic and safe to apply. It is VOC-free, making it an environmentally friendly option.
Quick and Efficient Application: Liquid rubber can be applied by cold spraying or manual application, allowing for a large volume of coverage in a short time, which in turn reduces the cost of work.
Warranty and Cost-effectiveness: Given its high reliability and quality, most contractors offer a warranty on their work when using liquid rubber. Moreover, the price of liquid rubber waterproofing sealant is often lower than other compounds of the same quality.
Implementing Liquid Rubber Waterproofing: A Step-by-step Guide
To ensure successful waterproofing using liquid rubber, it's essential to follow a systematic approach. Here's a step-by-step guide to help you navigate the process:
Prepare the Base: This involves cleaning the base from foreign materials, sharp bumps, and dust. This is a critical step that can significantly impact the overall waterproofing process.
Apply the Primer: The next step is to apply the primer to the surface. This improves the adhesion or adherence of the material to the surface.
Apply the Material: Depending on the type of liquid rubber you're using, you'll apply the material to the surface, allowing each layer to dry.
Important Considerations
While liquid rubber technology simplifies the waterproofing process, it's crucial to remember that knowledge and relevant experience are key to achieving the best results. If not applied properly, the material may not function as needed, leading to potential water damage in your basement.
Where to Use Liquid Rubber?
Liquid rubber is extremely versatile, making it suitable for waterproofing a wide range of structures in addition to basements. These include foundations, foundation slabs, walls, floors, roofs, concrete structures, tanks, concrete ponds, reservoirs, and tunnels.
What's more, liquid rubber can be applied to a variety of surfaces, including concrete, brick, metal, bitumen, and other coatings such as Technoelast membranes and other types of bitumen membranes, and expanded polystyrene.
Waterproofing Foundations with Liquid Rubber
Liquid rubber is an excellent solution for waterproofing foundations, whether they're foundation slabs or foundation walls. By adhering seamlessly to the surface and providing a high tensile coefficient, liquid rubber can withstand the shrinkage of the building or foundation without tearing or diverging.
Waterproofing Concrete Foundation Walls with Liquid Rubber
Liquid rubber creates a seamless, waterproofing area with maximum adhesion to the surface, making it one of the best materials for waterproofing walls. It is perfect for partitions made of concrete, bricks, blocks, aerated concrete, etc., even if they have uneven blocks.
Waterproofing Basements with Liquid Rubber
Liquid rubber is an effective solution for basement waterproofing, providing a water-tight strong foundation for your house. It offers perfect adhesion, eliminating the ingress of moisture and water under the applied coating.
Liquid rubber can also be used for metal roof waterproofing, offering maximum adhesion with concrete, metal, and any other coating, including old metal tiles. It's an ideal solution for those who don't want to remove old waterproofing but want to apply a new layer on top of it.
Waterproofing Concrete Floors with Liquid Rubber
Liquid rubber can also be used to waterproof concrete floors, providing a durable and resistant coating that can withstand heavy traffic and wear.
The Cost of Using Liquid Rubber for Waterproofing
The cost of liquid rubber for waterproofing varies based on the quality of the material and the area of application. However, it is generally a cost-effective solution, especially when you consider the long-term benefits and durability it offers.
Final Thoughts
As more and more DIYers and homeowners discover the benefits of liquid rubber for basement waterproofing, it's clear that this is a solution that's here to stay. Not only does it offer superior waterproofing capabilities, but it's also easy to use, cost-effective, and environmentally friendly.
So, the next time you're wondering how to keep your basement dry and protected, remember the power of liquid rubber. Here's what you need to know: it's not just a temporary fix; it's a long-term solution for keeping your home safe and sound.
In addition to this, for more insights and tips on home improvement projects, don't forget to check out our article on how to seal your outdoor deck with rubberized deck paint. Remember, whether you're waterproofing your basement or sealing your deck, the key to a successful DIY project lies in choosing the right materials and applying them correctly. And with liquid rubber, you're definitely on the right track.
]]>
https://shopliquidrubber.com/blogs/news/to-buy-an-rv-new-or-used-whats-the-best-bang-for-your-buck2023-06-13T14:16:41-04:002024-03-10T21:00:20-04:00To Buy an RV New or Used - What's the Best Bang for Your Buck?Michael Jon
The decision to buy an RV can be both exciting and daunting, especially when you're trying to decide between purchasing a new or used one. With a growing number of DIYers considering buying used RVs due to their affordability and repairability, this article will explore the pros and cons of each option.
]]>
The decision to buy an RV can be both exciting and daunting, especially when you're trying to decide between purchasing a new or used one. With a growing number of DIYers considering buying used RVs due to their affordability and repairability, this article will explore the pros and cons of each option.
What's more, we'll take a closer look at the importance of roof maintenance and repair, specifically highlighting the benefits of using products like Liquid Rubber's RV Roof Coating for DIY repairs.
New vs. Used RVs: The Key Differences
Buying a New RV: The Advantages
When you buy a new RV, you benefit from several key advantages that do make it an attractive option, provided that you are willing to allocate the budget.
Factory Warranty and Dealer Support: A new RV typically comes with a factory warranty, offering you peace of mind in case of any issues or major repairs. Dealer support is also available, ensuring you won't have to spend a fortune on repairs in the near future.
Customization Options: A new RV allows you to choose the specific layout, colors, and customizations that suit your preferences and lifestyle.
No Unknown History: With a new RV, there's no need to worry about any hidden issues or past problems. You're the first owner, and everything is brand new.
Easier Financing: Obtaining financing for a new RV is generally more straightforward than for a used one.
Buying a New RV: The Disadvantages
Despite its benefits, buying a new RV does come with some drawbacks that you should consider before you sign on the dotted line.
Higher Costs: New RVs can be expensive, both in terms of the initial purchase price and additional costs such as taxes, registration, and insurance.
Depreciation: New RVs often depreciate significantly in value, especially during the first few years of ownership.
Initial Repairs: New RVs may require a series of repairs during their first months on the road, as manufacturing flaws and other issues are discovered and addressed.
Buying a Used RV: The Advantages
Opting for a used RV offers several advantages over purchasing one that's new. Let's take a closer look.
Lower Costs: Used RVs generally come with a lower purchase price, taxes, registration, and insurance costs.
Less Depreciation: Used RVs experience less depreciation than new ones, making them a more cost-effective choice.
Worked Out Kinks: With a used RV, it's likely that any initial issues have been resolved, and the vehicle has been broken in by the previous owner.
Upgraded Amenities: Previous owners may have made upgrades to the RV, giving you added value.
Buying a Used RV: The Disadvantages
However, buying a used RV also has its disadvantages that shouldn't be overlooked during the purchase process.
Unknown History: With a used RV, you may be purchasing a vehicle with an unknown history, potentially leading to hidden issues and costly repairs.
Limited Warranty: Used RVs typically do not come with a factory warranty, potentially leaving you on the hook for any major repairs.
DIY Roof Repairs: A Cost-Effective Solution for Used RVs
One of the key concerns when buying a used RV is the potential need for roof repairs or replacement. RV roofs typically need restoring or replacement after 10 to 15 years, but there are cost-effective solutions available for DIY repairs.
New RVs, on the other hand, are less likely to require such repairs, but their higher purchase and maintenance costs, increased insurance premiums and higher licensing and taxes may outweigh the benefits of a problem-free roof over continued ownership.
Used RV Sales: A Growing Trend
The demand for used RVs is on the rise, with more and more people recognizing the benefits of buying a pre-owned motorhome. According to a recent report, used RV sales have increased significantly in recent years, highlighting the growing trend towards cost-effective and DIY-friendly options.
In 2021, used RVs sold nearly half a million units, representing a nearly 34% increase year over year as more people look to these comfortable and spacious motorehomes to enjoy the wonders of the wide open roads and the traveling lifestyle.
Making the Right Choice for Your Needs
Ultimately, the decision to buy a new or used RV will depend on your personal preferences, budget, and willingness to tackle DIY repairs. While new RVs offer the benefits of customization, warranty coverage, and no unknown history, their higher costs and depreciation may make used RVs a more attractive option for many.
So, whether you're a seasoned RVer or a first-time buyer, it's worth weighing the pros and cons of each option before making your decision.
For more information on RV maintenance and repair, check out this DIY Guide on How to Repair and RV Rubber Roof. And remember, when it comes to RV ownership, the right choice is the one that best suits your needs and lifestyle.
Stock up on all your DIY RV Roof Repair needs today and get 15% off your order using blog code: BLOG15. Happy RVing!
]]>
https://shopliquidrubber.com/blogs/news/the-diy-solution-for-your-deck-rubberized-deck-paint2023-06-05T18:55:16-04:002024-03-10T20:49:00-04:00The DIY Solution for Your Deck: Rubberized Deck PaintMichael JonMore]]>
Owning a deck can be a great addition to your home, providing a space for relaxation, entertainment, and increasing its overall value. However, maintaining a deck can be a daunting task, especially when it comes to choosing the right coating option. What's more, the durability and lifespan of your deck depend on the quality of the coating you apply.
This is where rubberized deck paint comes into play. In this article, we'll explore the numerous benefits of using rubberized deck paint, and why it's the best choice for your deck coating needs.
Why Choose Rubberized Deck Paint?
Rubberized deck paint is a high-performance, versatile, and easy-to-use solution that protects your deck from the elements while also enhancing its appearance. This type of deck coating offers a range of benefits that make it an ideal choice for both DIY enthusiasts and professional deck builders.
Long-lasting Protection
One of the most significant advantages of rubberized deck paint is its ability to provide long-lasting protection for your deck. The durable and resilient nature of this type of paint ensures that it can withstand harsh weather conditions, UV rays, and water damage, which are common causes of deck deterioration.
Slip-resistant Surface
The safety of your deck should be a top priority, and rubberized deck paint helps you achieve that. This type of paint creates a slip-resistant surface, reducing the risk of accidents and injuries caused by slipping on wet or damp surfaces. This feature is particularly beneficial for decks around pools or other water features.
Easy Application
Applying rubberized deck paint is a breeze, even for those with little to no experience in deck maintenance. The paint can be easily applied using a roller, brush, or sprayer, allowing you to achieve a professional finish without the need for specialized equipment or training. Plus, the quick-drying properties of rubberized deck paint ensure that you can enjoy your newly coated deck in no time.
Aesthetic Appeal
Rubberized deck paint is available in various colors and finishes, allowing you to create a customized look that complements your home and outdoor space. The paint can also be easily retouched or updated, making it an ideal solution for those looking to refresh their deck's appearance without the hassle of a full-blown renovation.
Cost-effective Solution
In the long run, rubberized deck paint proves to be a cost-effective solution, as it reduces the need for frequent maintenance, repairs, or replacement of deck materials. Its durability and protective properties ensure that your deck remains in excellent condition for years to come, saving you both time and money.
Start by giving your deck a thorough cleaning, removing any dirt, debris, or loose paint. You can use our Liquid Rubber Deck & Patio Cleaner, pressure washer, or even a simple broom and hose to get the job done. Allow the deck to dry for at least 48 hours before proceeding to the next step.
Step 2: Repair and Sand the Deck
Inspect your deck for any damaged or warped boards and replace them as necessary. Sand any rough or uneven areas to create a smooth surface for the paint to adhere to. Remember to remove any dust or debris after sanding.
Step 3: Apply a Primer
Although not always necessary, applying a primer can help the rubberized deck paint adhere better to the surface and enhance its protective properties. Choose our Liquid Rubber Multi-purpose Primer and allow it to dry for the recommended time before moving on to the next step.
Step 4: Apply the Rubberized Deck Paint
Apply the rubberized deck paint using a roller, brush, or sprayer, ensuring even coverage across the entire surface. Apply generous coats until the final coverage rate is reached, allowing each coat to dry for the recommended time before applying the next one. Be sure to follow the specific instructions provided by Liquid Rubber for the best results.
Step 5: Enjoy Your Newly Coated Deck
Once the paint is completely dry, you can enjoy your freshly coated deck, knowing that it's protected and ready for use.
Maintaining Your Rubberized Deck Paint
To ensure the longevity of your rubberized deck paint, it's essential to keep up with regular maintenance. This includes cleaning the deck periodically, removing any debris, and addressing any minor damage or wear as needed. For more tips on maintaining your deck, check out our related blog posts.
Final Thoughts
This specialized, long-lasting deck paint is the ultimate DIY solution for your deck coating needs. Its durability, ease of application, and various benefits make it an ideal choice for homeowners looking to protect and enhance their decks. So, if you're in search of a reliable and cost-effective deck coating option, look no further than Liquid Rubber.
Don't wait any longer – head to our online store to get started on your deck transformation today! If you have any questions or need assistance, feel free to reach out to us. We're here to help you make the most of your outdoor space.
]]>
https://shopliquidrubber.com/blogs/news/deck-coating-options-for-2023-here-are-the-most-popular-colors-to-consider2023-05-24T13:28:14-04:002024-03-10T20:55:06-04:00Deck Coating Options for 2023: Here Are the Most Popular Colors to ConsiderMichael Jon
The truth is that few investments you can make will yield as much satisfaction and enjoyment as renovating your outdoor living space. According to a recent study by NAR, more than 50% of homeowners have undertaken a home renovation project in the past year, with deck upgrades being one of the most popular choices, and 77% of homeowners say they'd rather renovate instead of selling.
As we look ahead and into the second half of 2023, let's explore the top deck coating options and the most popular deck colors to help you create a stunning and functional outdoor oasis.
1. Natural Wood Tones
Natural or Clear
One of the most popular deck coating options in 2023 for homeowners who want to maintain the natural beauty of their wooden deck is a clear or natural finish. This type of coating enhances the wood's grain and texture while providing protection against rot and weather damage.
Light or Golden Oak
For a versatile option that complements a wide range of outdoor décor, light or golden oak is an excellent choice. This light, neutral shade reveals the natural wood grain and requires minimal maintenance. As a bonus, lighter shades like this are generally easier to apply.
Walnut or Light Walnut
Walnut is another popular choice for deck owners who appreciate the warmth and richness of dark brown tones. Light walnut provides a slightly lighter variation, with a hue that's darker than honey or golden oak but still offers a touch of warmth and orange-brown tones that blend well with greenery in your backyard.
Honey
If you're after a timeless, classic look for your deck, consider a honey-colored coating. This popular deck color offers a light, warm tone that enhances the natural beauty of your wood.
2. Bold and Dramatic Colors
Black
For those who are seeking a more dramatic and eye-catching deck, black is an ideal choice. This striking color adds contrast and depth to your home's exterior or patio furniture while providing excellent water and UV ray resistance.
Redwood or Fiery Red
A bold and red deck can infuse your outdoor space with energy and life. Considered a classic color, redwood or fiery red offers a warm tone that pairs well with brick homes and other earthy materials.
Alligator Green
Green is another bold color option for your deck that's immensely popular in 2023. It highlights the natural surroundings of your outdoor space while helping to conceal imperfections and footprints on the deck surface.
3. Cool and Calming Shades
Light Blue
If you're looking for a unique and standout appearance, painting your deck light blue is a fantastic option. Consider choosing a semi-transparent light blue coating to maintain a natural wood look while adding a touch of cool, ocean-inspired color.
Colony Blue
Colony blue is an attractive, flat-finish alternative to more common blue shades and has become increasinly popular in recent years. This modern and chic color should be UV and mildew resistant to protect your deck from direct sunlight and weather exposure.
Calming or Dark Blue
A calming or dark blue deck coating can create a nautical ambiance in your outdoor space. This color brings both style and vibrancy, while also helping to conceal dirt and marks. It's natural undertones complement many types of darker colored outdoor furnishings, too.
4. Versatile Grays
Classic Gray
For a sophisticated and charming deck color, classic gray is a top choice in 2023 and beyond. This neutral shade features a base color of orange, yellow, or red, which blends seamlessly with most deck paint colors. Its subtle accents are especially enjoyable during the summer months.
Greige or Slate Gray
If you want a unique wood finish, then consider combining gray and beige (also known as "greige") or opt for a slate gray coating. Both of these options offer light hues with cool undertones, making them versatile and visually appealing choices for your deck.
Driftwood Gray
If you have a beach house deck or simply love the feel of summer, driftwood or dark gray is an ideal deck coating option that has a rustic and nostalgic feel. This color is commonly used to restore cracked or weathered decks and accentuate the natural textures of the wood.
5. Earthy and Neutral Tones
Beige or Tan
Sometimes a uniform appearance is the way to go. This is where beige or tan can be a versatile option that comes in both cool and warm shades. This deck color softens the overall look of your outdoor space and pairs well with various furniture and plant options.
Classic Taupe
Classic taupe is perfect for those who want a deck color that complements a dark brown stain. This shade provides excellent contrast and visual interest, while offering full-coverage and waterproofing capabilities.
Brownstone or Earthy Brown
Brownstone is a classy, earthy brown color that adapts well to changing surroundings. This lighter shade creates an inviting and attractive illusion, making your outdoor space more enjoyable and visually appealing.
6. Custom Combinations
Two-Tone
If you're looking for a truly personalized deck, consider using a two-tone color scheme. This technique works best for larger decks, allowing you to divide areas based on different activities or design preferences. These unique options do require a bit more elbow grease to pull off, but the final result will be well worth your efforts.
Contrasting Inlay
Add style and personality to your deck with a contrasting inlay. This technique can range from simple to complex and involves incorporating different colors and patterns into your deck design.
Colorful Railing
A colorful railing can add flair and interest to your deck. Be sure to choose shades that complement your home's exterior and speak to your personal style. Experiment with your favorite colors for an eye-catching and unique look.
7. Rubberized Deck Paint
Rubberized deck paint is an innovative option for homeowners seeking a durable and slip-resistant surface. This type of coating provides a protective barrier that can withstand heavy foot traffic and harsh weather conditions, making it a long-lasting and practical choice. What's more, you have plenty of options for different colors and the sky's the limit as far as your creativity can take you here.
Tips for Choosing the Perfect Deck Coating Options
Consider your home's exterior elements, such as siding, furniture, plants, and indoor flooring when selecting a deck color. The colors should complement and accentuate these features.
Understand the color wheel rules, which include dominant, secondary, and accent colors. The dominant color should be your deck color idea, while secondary and accent colors can be used for elements like furniture, rugs, pillows, and plants.
The shade and finish of your paint are important for both railings and flooring, as these areas define the deck's overall appearance.
Remember to mix your paint with an additive to create a non-slippery surface. Paints can be slippery when wet, so adding a sand-like texture will help prevent accidents.
Frequently Asked Questions
How long does deck paint usually last? Deck paint can last up to 10 years with proper preparation and finishing. However, some homeowners choose to repaint their decks annually, depending on local weather conditions. High-quality waterproof paints can provide long-lasting results.
What type of paint lasts the longest on decks? Polyurethane (oil-based paints) such as Liquid Rubber's Polyurethane Deck Coating will provide you with lasting, reliable coverage that's UV resistant, waterproof and easy to maintain for years to come.
How can you prepare your deck for staining or painting? Begin by thoroughly cleaning and allowing your deck to dry. Next, you're going to want to sand the surface to create a smooth, even texture. Check for any remaining dust or debris, cover adjacent surfaces with plastic sheeting, and apply painter's tape to protect nearby areas. Apply a primer before painting, ensuring your paint has non-slippery components for added safety. For a complete rundown, please reference our related guide: How to Seal Your Outdoor Deck with Rubberized Deck Paint.
Let's Wrap This Up
There are countless deck coating options and popular deck colors to choose from in 2023. Whether you prefer natural wood tones, bold and dramatic colors, or cool and calming shades, there's a perfect option to suit your tastes and enhance your outdoor living space. With proper preparation and application, your deck will serve as a beautiful and functional extension of your home for years to come.
]]>
https://shopliquidrubber.com/blogs/news/how-to-choose-the-right-rv-roof-sealant2023-05-15T13:30:00-04:002024-03-10T21:00:25-04:00How to Choose the Right RV Roof SealantMichael JonMore]]>
costly replacements along the way with proper maintenance.
Types of RV Roof Sealant
There are various types of RV roof sealant depending on the job you need to do. For most RV roof jobs, self-leveling RV roof sealant like our RV Roof Coating is a good option. This sealant levels itself out when applied to a flat surface, ensuring a smooth, even application. It's good for sealing seams around vents, skylights, and other rooftop accessories.
Non-sag RV sealant is another option. This type of sealant is best for vertical surfaces, as it is designed to stay in one place without dripping.
RV sealant tape is another option, which is best for patching small holes and rips in a rubber roof.
Another option is an RV roof patch kit, which can be a good choice for those who prefer a cleaner look.
Avoiding the Wrong Products
While there are many good products to choose from, there are also some products that you should avoid. Silicone sealants, for example, will not bond with other sealants and won't stay in place during travel. Likewise, FlexSeal is not a good choice for RV roofs, as it can ruin the roof. Finally, any product that is not compatible with your RV roof type should be avoided, as it can cause damage.
Determining Your RV Roof Type
There are four main types of RV roofs: EPDM rubber, TPO rubber, fiberglass, and aluminum. While it is easy to tell if you have an aluminum or fiberglass roof, determining whether you have a TPO or EPDM roof can be a bit trickier. A quick online search can help you make this determination.
Walkable vs Non-Walkable RV Roofs
Before resealing your RV roof, you need to determine if you have a walkable roof. Some RV roofs can support your weight, while others cannot. If you're unsure, you can call the manufacturer to find out. If the roof is not walkable, you'll need to move your ladder around while working to reach all the areas you need to reseal.
How to Reseal Your RV Roof
Resealing your RV roof is a fairly straightforward process, but it's important to choose the right day to do it. You want to work in warm and sunny weather, as this will allow the sealant to cure properly.
Start by cleaning the areas you want to reseal. Use a gentle cleaning product if necessary, but make sure it doesn't contain citrus, petroleum distillates, or mineral spirits (our RV Roof Smart Cleaner is ideal for this). Next, load your caulking gun with the sealant of your choice. Make sure to cover all the areas you want to seal, paying special attention to trouble spots. If you find any holes or rips, patch them as soon as possible.
RV Roof Coating
In some cases, RV roofs will need an RV roof coating in addition to sealant. This is especially true for EPDM roofs, which benefit from recoating every 5 to 10 years. RV roof coating can extend the life of your roof and keep it in good condition for longer.
Sealing Other Parts of Your RV
While resealing your RV roof is important, it's not the only part of your vehicle that needs attention. Windows, storage bays, and corners all need to be sealed from time to time, as well. Non-sag RV sealant is usually the best option for these areas, but sometimes it's necessary to remove the window or door and replace the butyl tape.
Using Liquid Rubber RV Roof Sealant
One of the best RV roof sealant products on the market is made by Liquid Rubber. It is easy to apply, long-lasting, and can help protect your RV roof from water damage. To use it, start by cleaning the roof thoroughly and making sure it is completely dry. Apply the sealant using a brush, roller, or sprayer. Make sure to coat the entire roof, and pay special attention to any seams, vents, or skylights. Allow the sealant to dry for at least 24 hours before exposing it to water.
Let's Sum It All Up
Sealing your RV roof is an important maintenance task that shouldn't be overlooked. By choosing the right RV roof sealant, cleaning the area thoroughly, and following the proper steps, you can protect your RV from water damage and extend its lifespan.
]]>
https://shopliquidrubber.com/blogs/news/is-liquid-rubber-non-toxic-yes-why-youll-love-this-non-toxic-pet-safe-eco-friendly-solution2023-04-26T13:59:05-04:002024-03-10T20:48:26-04:00Is Liquid Rubber Non-Toxic? YES! Here's Why You'll Love This Non-Toxic, Eco-Friendly SolutionMichael Jon
Liquid Rubber is an innovative, non-toxic, pet-safe, and eco-friendly solution for various applications. Its unique properties make it a versatile choice for waterproofing, sealing, and protecting surfaces, while also minimizing your impact on the environment.
]]>
Liquid Rubber has been gaining traction in recent years as a versatile, non-toxic, and eco-friendly solution for various applications. As a homeowner or business owner, you may have encountered issues related to water damage, leaks, or the need for durable and long-lasting waterproofing solutions. If you're searching for a product that can address these concerns while also minimizing your environmental footprint, Liquid Rubber is the answer you've been looking for!
What is Liquid Rubber?
Liquid Rubber is a water-based, elastomeric coating made from a combination of natural and synthetic polymers. When applied to a surface, it cures to form a flexible, rubbery membrane that is resistant to water, chemicals, UV radiation, and temperature fluctuations. The unique properties of Liquid Rubber make it an ideal solution for waterproofing, sealing, and protecting various surfaces, including roofs, walls, floors, and more.
One of the key reasons Liquid Rubber has gained popularity is its non-toxic nature. Unlike many traditional waterproofing solutions, Liquid Rubber does not contain harmful chemicals or volatile organic compounds (VOCs) that can be detrimental to human health and the environment. This makes it particularly appealing to those who are looking for a safer alternative to conventional waterproofing methods.
Non-toxic & Pet-Safe: A Closer Look
When it comes to waterproofing solutions, safety is a top concern for many people, especially if the product is being used in residential or commercial spaces where pets and children may be present. The good news is that Liquid Rubber is a non-toxic and pet-safe option that can be used without worry.
Liquid Rubber's non-toxic nature can be attributed to its water-based formula, which means it does not release harmful chemicals or VOCs during application or curing. VOCs are known to cause respiratory issues, headaches, and other health problems, so the absence of these compounds in Liquid Rubber is a significant advantage. What's more, Liquid Rubber is non-flammable, further contributing to its safety profile.
The Eco-friendly Benefits of Liquid Rubber
In addition to being non-toxic and pet-safe, Liquid Rubber is also an eco-friendly solution. As awareness around environmental issues grows, many people are seeking out products and practices that minimize their impact on the planet. Liquid Rubber checks several boxes when it comes to sustainability and eco-friendliness.
The water-based formula of Liquid Rubber reduces the release of harmful chemicals and VOCs into the atmosphere during application and curing. This helps to minimize air pollution and contributes to a healthier environment for humans and wildlife alike.
Liquid Rubber is highly durable and long-lasting, which means it requires less frequent replacement or maintenance compared to traditional waterproofing solutions. This translates to less waste and reduced consumption of raw materials over time. Furthermore, the flexibility and elasticity of Liquid Rubber allow it to expand and contract with changing temperatures and conditions, minimizing the likelihood of cracking or other damage that might require repair or replacement.
By choosing Liquid Rubber, you're not only opting for a safer, healthier alternative but also making a conscious decision to protect the planet.
Common Applications for Liquid Rubber
Liquid Rubber's versatility is one of its most appealing qualities. Its unique properties make it suitable for a wide range of applications, including but not limited to:
Roofing: Liquid Rubber is an excellent option for waterproofing and sealing roofs, both flat and sloped. It can be applied to various roofing materials, including metal, asphalt, concrete, and wood, providing a durable, weather-resistant barrier that can help prevent leaks and other damage.
Foundations and basements: The waterproofing capabilities of Liquid Rubber make it an ideal solution for protecting foundations and basements from water infiltration and damage. By creating a watertight seal around the perimeter of a building, Liquid Rubber can help prevent the entry of moisture, mold, and pests.
Ponds and water features: Liquid Rubber's non-toxic and durable nature makes it a popular choice for sealing and waterproofing ponds, fountains, and other water features. It can be applied to various surfaces, including concrete, stone, and brick, and is safe for fish and aquatic plants.
RVs, boats, and vehicles: Liquid Rubber's resistance to UV radiation, water, and temperature fluctuations make it a suitable option for protecting and sealing various types of vehicles, including recreational vehicles (RVs), boats, and trailers. It can be used to seal seams, joints, and other areas that may be susceptible to leaks or damage.
Planters and garden beds: For those looking to create non-toxic, eco-friendly garden spaces, Liquid Rubber can be used to line planters and raised garden beds, providing a waterproof barrier that prevents moisture from seeping into surrounding areas. Keep in mind that it is not food grade, so no Vegetables, Fruits or Herbs.
These are just a few examples of the many applications where Liquid Rubber can be utilized. Its versatility, combined with its non-toxic and eco-friendly properties, makes it an attractive choice for numerous projects.
Liquid Rubber vs Traditional Waterproofing Solutions
When comparing Liquid Rubber to traditional waterproofing solutions, several factors set it apart as a superior option:
Safety: As mentioned earlier, Liquid Rubber is non-toxic, making it a healthier choice for residential and commercial spaces. Traditional waterproofing products may contain harmful chemicals or VOCs that can pose risks to human health and the environment.
Eco-friendliness: Liquid Rubber's water-based formula and durability contribute to its eco-friendly profile. Traditional waterproofing solutions may not offer the same level of sustainability or environmental responsibility.
Versatility: Liquid Rubber can be applied to a wide range of surfaces and materials, making it a more versatile option compared to traditional waterproofing products that may be limited in their application possibilities.
Ease of application: Liquid Rubber can be easily applied using a brush, roller, or sprayer, and it does not require the use of specialized equipment or professional expertise. This makes it more accessible for DIY enthusiasts and those looking for a simple and cost-effective waterproofing solution.
Longevity and durability: Liquid Rubber's flexibility, elasticity, and resistance to water, chemicals, and UV radiation make it a highly durable and long-lasting solution. Traditional waterproofing products may not offer the same level of longevity or resistance to wear and tear.
Liquid Rubber is a safer, more eco-friendly, and versatile option compared to traditional waterproofing solutions. Its unique properties make it an excellent choice for a wide range of applications, from roofing all the way to garden beds.
Embracing a Non-toxic & Eco-friendly Solution
To wrap things up: Liquid Rubber is an innovative, non-toxic, and eco-friendly solution for various applications. Its unique properties make it a versatile choice for waterproofing, sealing, and protecting surfaces, while also minimizing your impact on the environment. By choosing Liquid Rubber, you can enjoy a safer, healthier, and more sustainable solution for your home or business.
So why not embrace Liquid Rubber today and experience its many benefits for yourself? Shop our selection now! Use code BLOG15 and save 15% off your next order!
]]>
https://shopliquidrubber.com/blogs/news/prolong-your-campers-lifespan-with-these-expert-tips-on-how-to-seal-a-rubber-roof-on-a-camper-for-long-lasting-protection2023-04-14T18:00:00-04:002024-03-10T20:48:22-04:00Prolong Your Camper's Lifespan with these Expert Tips on How to Seal a Rubber Roof on a Camper for Long-lasting ProtectionMichael Jon
In today's blog, we'll discuss the importance of sealing a rubber roof on a camper, the different types of camper rubber roof materials, and, most importantly: How to seal a rubber roof on a camper for long-lasting protection.
]]>
Owning a camper is a fantastic way to enjoy the great outdoors and travel with ease. However, to ensure your camper remains in excellent condition and serves you well for years to come, it's essential to perform regular maintenance, especially on the rubber roof. In today's blog, we'll discuss the importance of sealing a rubber roof on a camper, the different types of camper rubber roof materials, and, most importantly: How to seal a rubber roof on a camper for long-lasting protection.
Regular maintenance of your camper's rubber roof can help prevent leaks and water damage, prolong the life of your camper, and maintain its value. It's also essential to know the signs that your camper's roof needs sealing and how often you should seal it. Additionally, we'll provide some helpful tips for prolonging your camper's lifespan and discuss the benefits of hiring professional services for sealing camper rubber roofs.
Importance of sealing a rubber roof on a camper
Sealing a rubber roof on a camper is vital for several reasons. For starters, it helps protect your camper from water damage. Water can seep through even the smallest cracks or gaps, causing mold, mildew, and other issues that can affect your camper's structural integrity and overall health. By properly sealing your camper's rubber roof, you'll create a watertight barrier that prevents water infiltration, ensuring your camper remains in excellent condition.
Another viable reason for sealing a rubber roof on a camper is that it can help maintain its value. A well-maintained camper is more likely to retain its value over time, making it a better investment for potential buyers. Regularly sealing your camper's rubber roof demonstrates that you've taken care of your camper and can help you get a higher resale price when it's time to sell.
Types of camper rubber roof materials
There are two primary types of rubber roof materials used on campers: EPDM (ethylene propylene diene monomer) and TPO (thermoplastic olefin). Both materials are durable, lightweight, and flexible, making them suitable for camper roofs. However, they have different characteristics and may require different sealing methods.
EPDM is a synthetic rubber material that is highly resistant to UV rays, ozone, and extreme weather conditions. It is known for its long-lasting durability and low maintenance requirements. EPDM rubber roofs typically require a special EPDM sealant, which is specifically designed for use with this type of rubber material.
TPO, on the other hand, is a blend of polypropylene and ethylene-propylene rubber. It is also UV resistant and durable but has a slightly different appearance than EPDM, often featuring a smoother, more uniform surface. TPO roofs typically require a different type of sealant, such as a urethane-based product, to ensure proper adhesion and protection.
It's essential to know which type of rubber roof material your camper has before attempting to seal it, as using the incorrect sealant can lead to issues down the road.
Signs your camper roof needs sealing
Camper roofs are sturdy, without a doubt. But there are a few signs that may indicate it's time to seal your camper's rubber roof. Here’s what you need to look for.
Visible cracks, tears, or holes in the rubber membrane
Water stains or damage inside your camper, which may indicate a leak
Mold or mildew growth on the roof or inside the camper
Loose or damaged seams, which can allow water to seep in
A chalky or powdery residue on the rubber roof, indicating the material is breaking down due to UV exposure
Tools & materials you'll need
Make sure that you have all the tools that you’ll need on-hand from the get-go. To give you head start, here’s a helpful checklist that you can reference.
A soft-bristle brush or sponge for scrubbing the roof
A garden hose or pressure washer for rinsing the roof
Liquid Rubber Seam Tape and a seam roller (if you're repairing a seam)
The appropriate primer for your camper's roof material (EPDM Primer or Multi-purpose Primer)
A caulk gun for applying the sealant
Liquid Rubber RV Roof Coating
A utility knife for trimming excess sealant or rubber material
Clean rags or towels for wiping up any spills or excess sealant
Step-by-step guide: How to seal a rubber roof on a camper
If you’re looking to seal the rubber roof on your camper right the first time around, then just follow these steps, and learn how to dare to DIY differently!
Step 1: Clean the rubber roof
Before applying any sealant, it's essential to clean the rubber roof thoroughly. This will ensure proper adhesion of the sealant and a longer-lasting seal. Use Liquid Rubber RV Smart Cleaner or mild detergent and a soft-bristle brush or sponge to scrub the roof, removing any dirt, debris, and chalky residue. Rinse the roof thoroughly with a garden hose or pressure washer, ensuring all soap and debris are removed. Allow the roof to dry completely before proceeding.
Step 2: Inspect the rubber roof for damage
Once the roof is clean and dry, inspect it for any signs of damage, such as cracks, tears, or holes. If you find any issues, you'll need to repair them before applying the sealant. This may involve using a seam roller to re-adhere loose seams or applying a patch to cover any holes or tears.
Step 3: Apply the Seam Tape
Apply Liquid Rubber Seam Tape to all seams and skylights and press in well to activate the adhesive. Use Liquid Rubber RV Lap Sealant for smaller areas like bathroom vents or ladders.
Step 4: Apply Primer
Apply the correct primer for your roof type. Use Liquid Rubber Multi-purpose Primer for fiberglass, metal, wood or PVC type roofs. Use Liquid Rubber EPDM Primer for EPDM or aged/sanded TPO. Note that the EPDM Primer will remain very sticky after it cures, so be sure to apply it in manageable sections.
Step 5: Apply the coating
Apply Liquid Rubber RV Roof Coating to your camper's roof material. Apply generous coats until the final coverage rate is reached. Use 1 gallon for every 50 square feet final coverage. A 5-gallon pail will cover a 30 foot RV with all the coats you will need.
Step 6: Allow the coating to cure
Once you've applied the coating, allow it to cure. This typically takes about 4-8 hours in between coats and about 3-5 days for full cure before driving. Do not expose the roof to water or moisture during the curing process, as this can compromise the seal.
Step 7: Inspect the roof and touch up any areas as needed
After the coating has cured, inspect the roof again to ensure a proper seal has been achieved. If you notice any gaps or areas where the sealant has not adhered correctly, apply additional sealant as needed.
How often should you seal your camper's rubber roof?
The frequency with which you should seal your camper's rubber roof depends on several factors, including the type of rubber material, the climate in which you live, and the amount of exposure to UV rays and other elements. As a general rule, it's a good idea to inspect your camper's rubber roof at least once a year and reseal it as needed.
It's important to note that in harsher climates, or if your camper is exposed to constant sunlight, you may need to check and seal the roof more frequently. It's also essential to inspect the roof after any significant storms or incidents that could cause damage to ensure optimal integrity.
Additional tips for prolonging your camper's lifespan
In addition to regularly sealing your camper's rubber roof, there are a few other tips to help prolong its lifespan so you can enjoy those desirable road trips and adventures year round.
Regularly inspect and maintain all systems within your camper, such as the plumbing, electrical, and HVAC systems.
Keep your camper clean, both inside and out, to prevent damage from dirt, debris, and pests.
Store your camper in a covered or sheltered area when not in use to protect it from the elements.
Keep your camper's tires inflated to the proper pressure and check them regularly for wear.
Perform regular checks on your camper's brakes, suspension, and other mechanical components to ensure they're in good working order.
Ensuring long-lasting protection for your camper
Learning how to seal a rubber roof on a camper is an essential skill for any camper owner. Regularly sealing your camper's rubber roof will help protect it from water damage, maintain its value, and prolong its lifespan. By following the steps outlined in this article and staying vigilant with maintenance, you can enjoy your camper for many years to come.
Liquid Rubber is the preferred solution for many homeowners and DIY enthusiasts, with easy-to-apply products and video tutorials that help you get the best results. Browse our online catalog to see our products, and easily order all the supplies we've featured here.
]]>
https://shopliquidrubber.com/blogs/news/the-importance-of-waterproofing-deck-coating-keep-your-deck-safe-and-durable2023-03-29T13:47:15-04:002024-03-10T20:58:42-04:00The Importance of Waterproofing Deck Coating: Keep Your Deck Safe and DurableMichael JonAs a homeowner, there is nothing quite like having your own backyard deck. It's a place of solace, where you can relax and enjoy some outdoor time with your loved ones. But, with great power comes great responsibility, and in this case, it's the responsibility of maintaining it.
One of the most important aspects of maintaining your deck is waterproofing it. Today, we’ll be sharing with you the importance of waterproofing deck coating, how to identify signs that it's time to waterproof your deck, and why Liquid Rubber is the obvious choice.
Why You Need to Waterproof Your Wooden Deck
Your deck is constantly exposed to the elements, from rain and sun to snow and wind. As a result, it's highly susceptible to water damage, which can result in costly repairs. Water damage can also cause your deck to become weak and unsafe, which can be a major hazard to you and your family.
Waterproofing your deck is the best way to ensure its longevity and safety. It creates a barrier that prevents water from seeping into the wood, which can lead to rotting, warping, and splitting. Additionally, waterproofing helps protect your deck from mold and mildew, which can cause health problems.
Key Signs it's Time to Get the Job Done
It's important to be proactive when it comes to waterproofing your deck. Here are some key signs that it's time to get the job done:
Water stains on the wood
Warping or splitting of the wood
Mold or mildew growth
Fading or discoloration of the wood
Soft, spongy areas on the deck
If you notice any of these signs, it's important to take action immediately. Ignoring these issues can lead to more serious problems down the road.
Protecting it From the Sun
The sun can be just as damaging to your deck as water. UV rays can cause the wood to fade and lose its natural color. Additionally, prolonged exposure to the sun can cause the wood to dry out, which can lead to cracking and splitting.
To protect your deck from the sun, it's important to choose a waterproofing product that includes UV protection. This will help maintain the natural color of the wood and prevent it from drying out.
Preventing Dry Rot
Dry rot is a common problem for wooden decks. It occurs when the wood is exposed to moisture and begins to break down. This can lead to structural damage and make your deck unsafe.
To prevent dry rot, it's important to choose a waterproofing deck coating that is specifically designed to protect against it. Liquid Rubber is a great option because it creates a barrier that prevents moisture from seeping into the wood.
Making it Resilient to the Elements
Your deck is constantly exposed to the elements, from rain and snow to wind and sun. To ensure its longevity, you’ll need a waterproofing product that is resilient to these elements.
Liquid Rubber is an excellent choice because it is highly resistant to water, UV rays, and extreme temperatures. It also creates a seamless barrier that is highly durable, which means that it won't crack or peel over time.
Why Liquid Rubber is the Obvious Choice
When it comes to waterproofing your deck, there are many products available on the market. However, Liquid Rubber is the obvious choice for several reasons.
At the top of the list is the fact that it’s VOC-free, pet-friendly and nontoxic. But did you know that Liquid Rubber is also extremely easy to apply? It can be applied with a brush, roller or spray gun, and it dries quickly, which means that you can enjoy your deck again in no time.
Even better? Liquid Rubber is highly effective. It creates a seamless, waterproof barrier that protects your deck from water damage, UV rays, and extreme temperatures.
Perhaps the greatest benefit is that Liquid Rubber is highly durable. Unlike other products that can crack or peel over time, Liquid Rubber remains flexible and resilient, which means that it will last for years to come.
Liquid Rubber is the preferred solution for many homeowners and DIY enthusiasts, with easy-to-apply products and video tutorials that help you get the best results. Browse our online catalog to see our products, and easily order all the supplies we've featured here.
]]>
https://shopliquidrubber.com/blogs/news/rev-up-your-rv-for-spring-adventures-how-to-dewinterize-your-rv-like-a-pro2023-03-22T19:46:49-04:002024-03-10T21:01:29-04:00Rev Up Your RV for Spring Adventures: How to Dewinterize Your RV Like a ProMichael Jon
Before you can embark on your spring adventures, it's important to dewinterize your RV like a pro. In this article, we'll walk you through the steps to ensure your RV is ready for the road ahead.
]]>
There's nothing better than hitting the open road in your home-on-wheels. More than likely, you took steps to winterize your RV for winter, which was smart thinking. But before you can embark on your spring adventures, it's important to dewinterize your RV like a pro.
Understanding What Dewinterizing Means
Dewinterizing is the process of preparing your RV for use after it has been stored for the winter. Much like you would winterize your RV for the colder months, dewinterizing is the opposite of winterizing and involves reversing the steps taken to prepare your RV for storage.
How to Dewinterize Your RV
Dewinterizing your RV is important because it ensures that your RV is in good working condition and ready for use. Neglecting to do so can result in damage to your RV's systems and can even cause safety hazards.
Taking the time to dewinterize your RV before spring will help you avoid costly repairs and keep you safe on the road. Here’s an outline of the necessary steps you’re going to want to take before hitting the wide open road.
Inspecting Your RV After Winter Storage: Check for any damage or issues that may have occurred during storage, such as leaks, cracks, or pests. It's also a good idea to check your RV's tires for damage or low pressure. Remember that if you do find any leaks or roof damage, Liquid Rubber RV Roof Sealing is the fast, cost effective and eco-friendly solution to patching up your roof in a snap.
Water System Checks and Precautions: Next, you'll want to check your RV's water system. Start by flushing out the antifreeze that was used to winterize your RV. Then, sanitize your RV's fresh water system by using a water and bleach solution. Finally, run water through all of your RV's faucets and check for leaks.
Electrical System Checks: After checking your RV's water system, move on to the electrical system. Check your RV's batteries and make sure they are fully charged. Test all of your RV's lights, appliances, and electrical outlets to make sure they are in good working condition.
Propane System Checks: Make sure to also inspect your RV's propane system. Check all propane tanks and lines for leaks or damage. Test your RV's propane appliances to make sure they are working properly.
Exterior and Interior Cleaning: After checking your RV's systems, it's time to give your RV a thorough cleaning. Wash the exterior of your RV and clean the windows. Clean the interior of your RV, including the floors, walls, and furniture. Don't forget to clean out any storage compartments and drawers.
Time to Hit the Open Road!
Dewinterizing an RV is an important step in preparing your RV for spring adventures. By following these steps, you can ensure that your RV is in good working condition and ready for the road ahead.
After you've finished, it's time to prepare for your first spring RV trip. Make sure to check the weather forecast and pack accordingly. Stock up on food, water, and other supplies. Finally, plan your route and make any necessary reservations. Most importantly of all: enjoy the wide open road and safe journeys!
Liquid Rubber is the preferred solution for many homeowners and DIY enthusiasts, with easy-to-apply products and video tutorials that help you get the best results. Browse our online catalog to see our products, and easily order all the supplies we've featured here.
]]>
https://shopliquidrubber.com/blogs/news/say-goodbye-to-cracked-driveways-discover-the-magic-of-liquid-rubber-resurfacing2023-03-15T17:51:48-04:002024-03-10T20:48:16-04:00Say Goodbye to Cracked Driveways: Discover the Magic of Liquid Rubber ResurfacingMichael JonMore]]>
As a homeowner, maintaining the appearance and functionality of your property is a top priority. However, there are certain elements that can be challenging to maintain, such as your driveway. Over time, your driveway may become cracked and worn, detracting from the overall look of your home. Thankfully, there is a solution: Liquid Rubber resurfacing.
Liquid Rubber resurfacing is a cost-effective and long-lasting way to restore the look and functionality of your driveway. Unlike traditional methods, such as concrete or asphalt replacement, Liquid Rubber resurfacing is a non-toxic and eco-friendly option that can be applied directly over your existing driveway.
The Problem with Cracked Driveways
Cracked driveways not only look unsightly, but they can also pose safety hazards. Over time, cracks can widen and deepen, creating tripping hazards for you and your guests. Even scarier is that water can seep into the cracks, causing further damage and potentially leading to more costly repairs down the line.
Understanding the Benefits of Liquid Rubber Resurfacing
One of the main benefits of Liquid Rubber driveway resurfacing is its durability. Unlike traditional methods that may require frequent repairs or replacements, Liquid Rubber resurfacing can last between 5-10 years with proper maintenance. A cost-effective option, it can be applied directly over your existing driveway, eliminating the need for costly removal and disposal of old materials.
Perhaps one of the best benefits to using Liquid Rubber is that its non-toxic and eco-friendly. Traditional methods may require the use of harsh chemicals and materials, which can be harmful to the environment and your health. Liquid Rubber resurfacing, on the other hand, is made from non-toxic materials and does not emit harmful fumes, making it a safe option for you, your family and your pets.
How Liquid Rubber Resurfacing Works
In the resurfacing process, specialized Liquid Rubber coating is poured over your existing driveway. The coating is applied in multiple layers, ensuring a smooth and even surface. Once applied, it cures to form a durable and waterproof surface that can withstand heavy traffic and extreme weather conditions for years to come.
The process of Liquid Rubber resurfacing typically involves the following steps:
Preparation: The existing driveway is thoroughly cleaned and any cracks or holes are filled.
Application: The Liquid Rubber coating is applied in multiple layers, ensuring a smooth and even surface.
Curing: Once the coating is applied, it cures to form a durable and waterproof surface that can withstand heavy traffic and extreme weather conditions.
FAQ About Liquid Rubber Resurfacing
If you’re still in the decision making process about whether or not you should resurface your driveway with Liquid Rubber, it’s helpful to have as much information as possible.
Here are some frequently asked questions that you can rely on to help arrive at an educated decision:
How long does Liquid Rubber resurfacing last? Liquid rubber resurfacing can last between 5-10 years with proper maintenance.
Is Liquid Rubber resurfacing safe? Yes, liquid rubber resurfacing is safe and non-toxic.
How long does the process of Liquid Rubber resurfacing take? The process of resurfacing typically takes 2-3 days, depending on the size of the driveway.
4 Tips for Maintaining Your Resurfaced Driveway
We all want a nice-looking driveway that adds curbside appeal. Getting there isn’t as difficult as you might suspect.
To ensure the longevity of your resurfaced driveway, it is important to follow these four useful tips:
Avoid heavy machinery and vehicles on the driveway.
Regularly clean the surface with a mild detergent and water.
Avoid using harsh chemicals on the surface.
Address any cracks or damage immediately to prevent further damage.
Why Liquid Rubber Resurfacing is the Answer
If you're tired of dealing with a cracked and worn driveway, Liquid Rubber resurfacing may be the ideal solution for you. This cost-effective and long-lasting option is non-toxic and eco-friendly, making it a safe option for you and your family. Say goodbye to cracked driveways and discover the magic of liquid rubber resurfacing today.
Liquid Rubber is the preferred solution for many homeowners and DIY enthusiasts, with easy-to-apply products and video tutorials that help you get the best results. Browse our online catalog to see our products, and easily order all the supplies we've featured here for your own basement waterproofing project.
]]>
https://shopliquidrubber.com/blogs/news/how-much-does-it-cost-to-replace-an-rv-roof2023-02-24T12:34:37-05:002024-03-10T21:01:24-04:00How Much Does it Cost to Replace an RV Roof?Michael Jon
Replacing an RV roof can be an expensive and time-consuming process, so it is important to consider all the factors involved before taking the plunge. How much does it cost to replace an RV roof instead of repair it?
]]>
Replacing an RV roof can be an expensive and time-consuming process, so it is important to consider all the factors involved before taking the plunge. How much does it cost to replace an RV roof instead of repair it? Let’s dive in and find out.
What to Consider Before Replacing an RV Roof
Before replacing your old RV roof, it is important to consider a few factors. Start with the age of your vehicle. If your RV is more than ten years old, then it may be time to consider repairing or replacing the roof.
Older RV roofs tend to become brittle, crack and leak more easily, leading to costly repairs. You’re going to also want to consider the material used to construct your RV roof. If the material is in poor condition, then it is likely time to replace the roof. The reality is that different types of roofs have different installation and repair costs.
Types of RV Roofs
When it comes to replacing an RV roof, there are several different types of roofs to choose from. The most common type of RV roof is a rubber roof.
Rubber roofs are durable, lightweight, and easy to install. They are also relatively inexpensive and widely available, hence their popularity.
Another common type of roof is a metal roof. Metal roofs are strong and durable, and they require minimal maintenance. They are also very lightweight and easy to install. However, metal roofs are more expensive than rubber roofs and require more specialized tools for installation.
Fiberglass roofs are also popular for RV roofs. Fiberglass roofs are durable and easy to install. They also cost less than metal roofs. However, fiberglass roofs are heavy and require special tools for installation.
Lastly, there are acrylic roofs. Acrylic roofs are very lightweight, and they do not require too much maintenance. They’re inexpensive but are not as durable as rubber or metal roofs.
Cost to Replace an RV Roof
Now that you know the type of RV roof you have, it’s time to consider the cost to replace it. The cost to replace your RV’s roof will vary depending on the size of the RV, the type of roof, and the materials used. Generally speaking, a small RV roof replacement can cost anywhere from $500 to $2,500, while a larger RV roof replacement can cost anywhere from $2,500 to $10,000.
In addition to the cost of the materials, there are also labor costs to consider. If you choose to hire a professional for the job, then you can expect to pay anywhere from $500 to $2,500 for labor, depending on the size of the RV, the type of roof and the complexity of the job. If you choose to do the job yourself, then you can expect to pay only for the materials and the investment of your own DIY sweat equity.
DIY vs Professional Installation
When it comes to replacing an RV roof, there are two options: DIY or professional installation. If you choose to do the job yourself, then you can save money on labor costs. However, it is important to note that DIY installation is not for everyone. It requires a certain level of skill and knowledge, and it can also be time-consuming.
On the other hand, if you hire a professional for the job, then you can be sure that the job will be done correctly and safely. Professional installation is also faster than DIY installation, so you can get back to enjoying your RV sooner. However, professional installation can be more expensive than DIY installation.
Repair or Replace?
Not only will repairing your RV roof with the Liquid Rubber RV Roof Coating System be more affordable, but it will also be less labor intensive and is much easier to do. We have many resources available including application guidelines, videos and technical support agents to help you achieve a successful application that will last for years!
You can view our products and project pages at shopliquidrubber.com, and if you have any questions you can reach out to us at support@shopliquidrubber.com or by calling 1-855-592-1049.
]]>
https://shopliquidrubber.com/blogs/news/how-to-stop-basement-leaks-in-3-simple-diy-steps2023-02-16T16:43:56-05:002024-03-10T20:51:15-04:00How to Stop Basement Leaks in 3 Simple DIY StepsMichael JonWater damage can be a homeowner's worst nightmare, leading to costly repairs if not properly managed. The most common type are basement leaks, which can be especially problematic, leading to mold, mildew, and structural instability. Fortunately, there are a few simple DIY steps you can take to stop basement leaks and waterproof your walls and foundation beforehand. With the right supplies and a little bit of know-how, you can easily prevent water damage in your basement and keep your home dry.
Today, we'll go over the three simple DIY steps you can take to stop basement leaks and keep your home safe from water damage.
Identifying the Leak Source
The first step in fixing a leaky basement is to identify the source of the leak. This can be tricky, as the water may be coming from multiple sources, or the source may be hidden behind a wall or under the flooring. To get started, you'll need to inspect the basement walls and floors carefully, looking for signs of moisture, discoloration, or staining. If the leak is coming from a pipe, for example, you may also be able to see condensation or dripping water.
Once you've identified the source of the leak, you can move on to the next step in the process. Another way to identify the source of the leak is to use a moisture meter. These devices measure the moisture content of a material, allowing you to pinpoint the exact source of the leak; and they can also help you identify any other areas in the basement that may be at risk of water damage.
Preparing the Area for Repair
When preparing the area for repair, you'll also need to make sure you have all the necessary supplies on hand. This includes a trowel, paint roller, old clothing to wear while painting and the right type of Liquid Rubber for the job. Notwithstanding any other materials needed to complete the repair. It's also a good idea to have a bucket, mop, and towels handy to clean up any spills or messes that may occur during the repair process.
Performing the Repair
No matter what type of repair you need to do, it's important to make sure the area is completely dry before you begin. This will help ensure that the repair is effective and that it will last. Once the area is dry, you can apply Liquid Rubber using these steps to waterproof the interior of your basement.
Inspecting for Additional Leaks
It's a good idea to check the area periodically in the future to make sure the repair is still effective. If you notice any signs of a leak, you'll need to repeat the repair process as soon as possible to prevent further water damage.
Maintaining Your Basement
You’ll want to check up on things every once in a while, looking for any signs of moisture or dampness. If you notice any, you'll need to take steps to address the issue before it leads to a leak. This may include installing a dehumidifier in the basement, sealing any cracks in the walls or floors, or replacing any old or damaged pipes, if you notice persistent moisture.
Cost-Effective Solutions for Fixing Leaks
While basement leaks can be a major headache for homeowners, and can lead to potentially costly repairs, there are a few simple DIY steps you can take to stop basement leaks before they do serious damage.
Shop Liquid Rubber’s basement waterproofing products today to find the cost-effective DIY solution for sealing any cracks or holes in the walls or floors. With the right supplies and a little bit of elbow grease, you can easily keep your basement dry and prevent any water damage from occurring now and well into the future.
]]>
https://shopliquidrubber.com/blogs/news/discover-a-world-of-fun-facts-about-liquid-rubber-you-wont-believe-72023-01-30T15:58:49-05:002024-03-10T20:48:05-04:00Discover a World of Fun Facts About Liquid Rubber - You Won't Believe #7!Michael Jon
Today, we're going to take you on a journey into the world of liquid rubber and share some fun facts about this awesome material that you won't believe! So let's dive in!
]]>
We're sure that you're all familiar with rubber, but do you know about liquid rubber? It's an amazing material with some unique properties that make it a great choice for a variety of DIY home improvement applications. Today, we're going to take you on a journey into the world of liquid rubber and share some fun facts about this awesome material that you won't believe! So let's dive in!
What is Liquid Rubber?
Liquid rubber is a special type of rubber that has been liquified for application and use. It is made by combining rubber polymers with water, resulting in an easy-to-apply liquid form. This liquid form can be applied to a variety of surfaces, from wood to concrete, and it forms a durable and waterproof coating that is resistant to UV radiation and even some chemicals. It's also an effective soundproofing material, making it a great choice for those looking to reduce noise pollution in their homes or businesses.
Fun Fact #1: Liquid Rubber is 100% waterproof
One of the most impressive properties of liquid rubber is that it is 100% waterproof and can be used in a variety of wet environments. This makes it great for applications like roofing, waterproofing, pond sealing, deck sealing, basement waterproofing, foundation sealing, and so much more! It's also incredibly durable, so it can handle a lot of wear and tear without losing its waterproofing properties.
Fun Fact #2: Liquid Rubber is Easy to Apply
Another great property of liquid rubber is that it is applied like normal paint, so no special tools or skills are required to apply our products. The biggest difference is that our products are applied much thicker than paint. You simply apply generous coats until the final coverage rate is reached, and with our coverage calculator we eliminate all the guess work.
Fun Fact #3: Liquid Rubber is resistant to UV radiation
Liquid rubber is resistant to UV radiation, meaning it won't break down over time in the sun. This makes it an ideal choice for outdoors applications, such as roofing and waterproofing, as it won't be affected by the sun's rays. It's also great for protecting surfaces from fading and discoloration for the same reasons, too.
Fun Fact #4: Liquid Rubber is chemically inert
Liquid rubber is also chemically inert, meaning it won't react with other materials. This makes it the ideal consideration for a variety of DIY applications, from sealing and bonding to coating and protecting. It's also a viable candidate for protecting surfaces from corrosion.
Fun Fact #5: Liquid Rubber can be used as a sealant
One of the most popular uses for liquid rubber is as a sealant. It can be used to seal gaps and cracks, protecting surfaces from water and other elements. It's such a strong sealant, in fact, that you can use to seal your foundation, your new pond even even your decking.
Fun Fact #6: Liquid Rubber is an effective soundproofing material
One of the most interesting properties of liquid rubber is that it is an effective soundproofing material. This means it can be used to reduce noise pollution in homes and businesses, making it a great choice for those looking to create a quieter environment.
Fun Fact #7: Liquid Rubber Has Multiple Options
The last fun fact we want to share with you is that liquid rubber has multiple product options to suit almost every project around your home.
Let's Wrap Things Up
So there you have it! Seven fun facts about liquid rubber that you may not have known. From basement waterproofing to soundproofing, liquid rubber is an amazing material with a variety of uses. So if you're looking for a durable, waterproof, and fire retardant material for your next project, you can't go wrong with liquid rubber!
Thanks for reading! We hope you enjoyed this blog post and found it informative. If you're ready to get started with your liquid rubber project, make sure to check out our selection of liquid rubber products. We have everything you need to get your next DIY job done right.
]]>
https://shopliquidrubber.com/blogs/news/4-diy-waterproofing-tips-for-your-deck-how-to-keep-it-in-great-condition2023-01-24T14:56:15-05:002024-03-10T20:48:10-04:004 DIY Waterproofing Tips for Your Deck: How To Keep It In Great ConditionMichael Jon
There are a few simple DIY waterproofing tips for decks that you can use to keep yours looking new.
]]>
Waterproofing your deck will help keep it looking great for years to come and save you from costly repairs down the road. There are a few simple DIY waterproofing tips for decks that you can use to keep yours looking new. With some basic supplies and a little bit of work, you can waterproof your deck in no time and ensure that it remains in great condition. Read on to learn more.
Preparing Your Deck for Waterproofing
Before you begin deck waterproofing, you'll want to clean and prepare your deck.
Clean the surface thoroughly to remove any dirt, debris, and contaminants. You can use a power washer or Liquid Rubber Deck & Patio Cleaner to get it nice and clean.
Be sure to protect your plants and other greenery around the deck before you begin.
Cleaning and preparing your deck will help ensure that the sealant adheres properly and that your deck stays dry and in good condition.
DIY Waterproofing Tips for Decks
Now that you've cleaned and prepared your deck, it's time to begin deck waterproofing. There are a few different methods you can use to waterproof your deck: use a sealant or a deck stain.
Sealants provide more thorough waterproofing, while stains offer more protection against fading over time. You can use a sealant or stain in combination with each other to help extend the life of your deck even further. If you choose to use a sealant, make sure that you choose the right one for your surface. Some sealants work better on certain types of wood, so it's best to be sure beforehand. You can also add a stain to your sealant to help extend the life of your deck even further.
If you choose to use a deck stain, you'll aslo want to check and make sure that you choose the right one for your surface (they can vary), and some stains work better on certain types of wood, so it's best to be sure beforehand.
1. Apply a Sealant
If you decide to use a sealant for your deck waterproofing, like Cool Foot Deck Coating, you'll want to apply at least three heavy coats of sealant to the surface of your deck. The first coat of sealant will help prevent water from entering the wood and damaging it, while the second coat will help it adhere properly to the surface of your deck. The third coat will act as an added protective layer that fully waterproofs the wood. Make sure that you apply the sealant to the entire surface of your deck. Do not forget to apply it to the top, bottom, and sides, too.
2. Use a Deck Stain
Stain is great for preventing your deck from fading over time, but it won't provide the same amount of protection as a sealant does. Combining the two is the best approach, but you will still gain some benefits from staining your deck. Conduct some research in advance to ensure you purchase the right stain for the type of wood in your decking for optimal results.
3. Use a Deck Stain and Sealant Combo
If you decide to use a deck stain and sealant for your deck waterproofing, you will want to apply the stain first and allow it to dry completely. Once it is dry, you can apply the sealant to the surface of your deck afterward. This will help protect your wood from water damage and will extend the life of your deck.
4. Install a Deck Drainage System
A deck drainage system is a great option if you have a very large deck and a lot of water tends to build up on the surface. This type of specialized system will direct the water away from your deck and down a nearby gutter. This is a great solution if you have a lot of water that collects on your deck each year. Combined with deck sealant and/or staining, this is a viable means to keep your deck waterproof year in and year out.
Liquid Rubber is the preferred solution for many homeowners and DIY enthusiasts, with easy-to-apply products andvideo tutorialsthat help you get the best results. Browse ouronline catalogto see our products, and easily order all the supplies we've featured here.
]]>
https://shopliquidrubber.com/blogs/news/how-to-make-your-concrete-water-fountain-100-waterproof2023-01-03T15:12:16-05:002024-03-10T20:48:02-04:00How to Make Your Concrete Water Fountain 100% Waterproof!Michael Jon
By following the steps outlined in today’s blog and taking good care of your fountain, you can be sure that your concrete water fountain is 100% waterproof and remains an eye-catching water feature you can enjoy for years to come.
]]>
When it comes to keeping your concrete water fountain in top condition, one of the most important things you can do is to make sure that it's 100% waterproof. Waterproofing your fountain will not only help protect the fountain itself, but also the surrounding area from water damage.
The materials you’ll need for waterproofing your concrete water fountain depend on what kind of fountain you have. If you have a sealed fountain, you’ll need a waterproofing sealant such as NeoPond Sealant. If your fountain is not sealed, you’ll need to seal it first. Read our related guide on this: How to Seal a Pond Like a Pro to Prevent Leaks. You'll also want a roller or brush, pressure washer and some mild detergent.
Applying the Liquid Rubber Neopond Sealant
Once you have all the materials you need, it’s time to apply the Neopond Sealant.
Start by cleaning the surface of your fountain with a pressure washer and mild detergent. If there is any dirt, debris, or other substances on the fountain, they must be removed before you can apply the sealant.
When you’re ready to apply the Liquid Rubber Neopond Sealant, start at the bottom of the fountain and work your way up.
Use the brush or roller to apply generous layers of sealant to the surface, making sure to cover all areas. Let the sealant dry completely before applying additional layers.
Apply minimum final thickness of 1 gallon per 50 sq ft (4.6 sq/m).
Once you’ve applied three to four thick layers, you’re ready to move on to the next step.
Let the coating cure for 3-5 days after your last coat before filling/using the fountain.
Testing the Waterproofing
After you’ve applied the sealant and allowed it to cure, you’ll need to test out the waterproofing. Start by filling the fountain with water slowly. If the water leaks out, you're going to need more sealant applied to anywhere the water is leaking. If the water stays in the fountain, you can be sure that your fountain is properly sealed and is now waterproofed.
Consider testing small areas around your pond as a failsafe method. Keep in mind that if you’ve applied three or more thick layers of pond sealant, and allowed ample curing/drying time, your pond should be fully waterproofed.
Tips for Keeping Your Concrete Water Fountain Waterproof
Now that your fountain is waterproof, it’s important to take care of it to make sure it stays that way.
Here are some tips for keeping your concrete water fountain waterproof:
Clean your fountain regularly. Make sure to remove any dirt or debris that may have built up.
Check for cracks or holes in the fountain. If you find any, you’ll need to repair them and waterproof the areas that you implemented any repairs to.
Reapply the sealant every four or five years. This will help ensure that the sealant is effective in waterproofing your pond.
If you live in an area that experiences extreme weather, you may need to waterproof your fountain more often.
Let's Wrap Things Up
Waterproofing a concrete water fountain is fairly straightforward DIY job. By following the steps outlined in today’s blog and taking good care of your fountain, you can be sure that your concrete water fountain is 100% waterproof and remains an eye-catching water feature that you can enjoy for years to come.
Need Even More Tips?
Liquid Rubber NeoPond Sealant should be a part of your pond waterproofing gameplan.
If you are looking for even more tips on taking care of your pond, we recommend that you read our related guide: Pro Tips to Winterize Your Pond.
Liquid Rubber is the preferred solution for many homeowners and DIY enthusiasts, with easy-to-apply products and video tutorials that help you get the best results. Browse our online catalog to see our products, and easily order all the supplies we've featured here.
]]>
https://shopliquidrubber.com/blogs/news/how-to-use-basement-waterproofing-paint2022-12-19T19:08:04-05:002024-03-10T20:51:20-04:00How to Use Basement Waterproofing PaintMichael Jon
Preventing water ingress into your basement is a proactive approach to protect your real estate investment. Rely on this guide to learn how to use basement waterproofing paint.
]]>
Basement waterproofing paint, such as Liquid Rubber’s Foundation Sealant / Basement Coating, is a cost-efficient way to protect your home from water damage. It is a simple and easy-to-apply product that can help you avoid costly repairs and maintenance. With the right preparation and application, you can make sure that your basement is properly sealed and waterproofed.
Before you begin, it’s important to understand the basics of basement waterproofing paint, so that you can get the most out of it. This guide will provide you with the information you need to successfully use basement waterproofing paint to protect your home and keep it safe from water damage.
What is Basement Waterproofing Paint?
Basement waterproofing paint is a specialized coat of paint that protects your basement walls from water damage. Unlike regular paint, which is designed to be decorative and provide a surface seal, waterproofing paint contains special ingredients that repel water.
A properly applied coat of basement waterproofing paint can protect your walls from moisture that can cause mold and mildew. It can also help reduce the amount of time you have to wait before using your basement.
The key to a successful application is to choose the right paint for your needs and apply it correctly. The Liquid Rubber Foundation Sealant / Basement Coating, gives you a VOC-free, water-based option that has no solvents, and is a cost-effective solution for all your basement waterproofing needs.
Benefits of Using Basement Waterproofing Paint
There are many benefits of using basement waterproofing paint to protect your basement from water damage.
Waterproofed walls are much more resilient against water damage, which can result in less expensive repairs and maintenance.
The best basement waterproofing paint will prevent water from soaking into the surface of your walls. This can help you avoid costly repairs and maintenance, like replacing soggy drywall and repairing buckling flooring.
Waterproofed walls will look better and last longer.
Regular water damage can cause your walls to deteriorate more quickly. This can result in higher repair costs and may even require you to replace the walls entirely.
Proactive basement waterproofing is the best way to prevent this and keep your home looking beautiful.
How to Prepare for Applying Basement Waterproofing Paint
Before you apply basement waterproofing paint, there are several steps you should take to prepare the surface properly.
The first step in the process is to clean and tape your walls. You will want to remove any debris and clean the surface so that the waterproofing paint can adhere properly.
Once your walls are clean, use a putty knife to create a smooth surface by taping off the edges. This will give you a nice, clean edge when you apply the paint.
Next, you’ll want to fill in any cracks and holes in the wall with a filler. This will create a smooth and even surface for the waterproofing paint to adhere to.
When you’re ready to apply the paint, be sure to choose a high-quality product that will last for years to come.
Applying Basement Waterproofing Paint
There are a few steps to follow when applying basement waterproofing paint:
First, you’ll want to cover the floor and equip yourself with the appropriate safety gear. You don’t want to get paint on your hands, so you’ll want to use gloves and a drop cloth, too.
Next, load your paint roller with the appropriate amount of paint.
You’ll want to apply a thick coat of paint to ensure a proper seal. You don’t want to apply too much paint, as this can create a sticky and difficult-to-clean surface.
Once you’re ready to apply the paint, roll it along the wall in smooth, even strokes. Make sure to apply the paint to all areas, including corners and edges.
Apply 2-3 heavy coats to any vertical surface for optimal results.
Tips for Applying Basement Waterproofing Paint
If you’re new to painting, you may need to practice with a smaller project before tackling your basement. It’s important to use the right tools and follow a few best practices for a successful application.
Begin at the top of your wall, near the ceiling, and work your way down. This will help you avoid drips and messes.
Make sure your walls are clean and free from debris before beginning.
Apply a thick coat of waterproofing paint to ensure a proper seal.
Keep your roller or brush wet during the application process. This will help you avoid drips and streaks.
How to Test for Basement Waterproofing Paint
If you’re not sure that your basement waterproofing paint is working properly, there is an easy way to test it: simply pour water on the walls. If the water beads up and doesn’t seem to soak into the wall, the paint is working properly. If the water soaks into the wall, you may want to consider applying a new coat of paint.
You can also take a test strip and press it against your wall to see if water beading up indicates a successful application. If water is beading up on your test strip, it’s likely the paint is working properly. If water seems to soak into the wall, you may want to apply a new coat of paint and or allow a longer curation time in between adding an extra coat.
How to Maintain Basement Waterproofing Paint
Maintaining your basement waterproofing paint is simple and easy. You can use a paintbrush and water to clean off any dust or debris that may have collected on the surface. You can also use a paint roller sleeve to gently roll the surface, which will help to remove any loose debris that may have collected on the paint.
Never use solvents or abrasive cleaners, as these will break down the paint and strip it of its waterproofing properties. You should also avoid painting over waterproofing paint. Once you’ve applied waterproofing paint, you shouldn’t have to paint over it again. This can strip the paint of its waterproofing properties.
Liquid Rubber is the preferred solution for many homeowners and DIY enthusiasts, with easy-to-apply products and video tutorials that help you get the best results. Browse our online catalog to see our products, and easily order all the supplies we've featured here for your own basement waterproofing project.
]]>
https://shopliquidrubber.com/blogs/news/pro-tips-to-winterize-your-pond2022-12-12T09:00:00-05:002024-03-10T20:53:28-04:00Pro Tips to Winterize Your PondMichael Jon
By putting in a little bit of effort now and using these pro tips to winterize your pond, you can avoid costly mistakes like cracked plumbing or loss of fish and plant life.
]]>
Winter is upon us, but before you crack open the eggnog and settle down by the fire, we want to take a moment to make sure your pond or water feature has been properly winterized, so you don’t have to deal with the consequences once spring rolls back in.
By putting in a little bit of effort now, you can avoid costly mistakes like cracked plumbing or loss of fish and plant life.
Read our guide below to help you properly prepare your pond this winter.
Pro Tips for Winterizing Your Pond
It is best to begin winterizing your pond in the fall before the leaves start to fall, ground frost sets in and the water temperature begins to drop.
In Northern climates this may be around September/October while Southern regions may have a bit more time.
Consult your local pond or fish professionals to ensure you get to it at the best time of year in your area.
Here are a few tips to help ensure your fish, plants and pond are prepared for the winter.
Plants
By installing a pond net you can catch most of the leaves and debris that trees and plants shed during the fall, saving you the unpleasant job of having to scoop it off the bottom later. This debris will otherwise accumulate on the bottom and decay, providing the nutrients that algae and bacteria need to thrive. Once the leaves have stopped falling, you can just roll up the netting and dispose of the refuse.
While the leaves are still falling, you will need to clean out the skimmer basket every few days, as it may fill up quickly depending on how many trees and plants are in the area. Once the leaves have stopped falling, you won’t need to do this nearly as often.
According to Marquis Gardens, all hardy water lilies and submersible plants can be dropped down to the deepest point in the pond for the winter (Foliage from Lilies should be cut back to reduce decaying matter). Floating plants can be removed, and hardy marginals can be trimmed back, leaving around 2" to 4” of the plant from the base and tropical water plants can be moved to a sunny indoor area (be sure to keep the soil moist).
Cold Water Bacteria
Adding cold water bacteria will provide beneficial bacteria that help maintain water quality and clarity. These bacteria are designed to work in colder water temperatures, and will also help to reduce spring clean up by digesting the debris that may accumulate over the winter.
Fish
When water temperatures start to drop fish need a more specialized diet that is easier to digest in cooler temperatures. It is usually suggested to change over to this diet when temperatures get around 50-60F/10-15C and to stop feeding them all together once you reach 45-50F/7-10C as they will become dormant.
Koi and pond fish can be overwintered in ponds that are 42-48” or deeper as long as there is a pond heater and aeration present. For shallow ponds, it is recommended that you bring your fish indoors.
Air stones should not be near the fish as they will transfer cooler air to where the fish are. Move them to around half the depth of the pond or at least 2 feet from the bottom for the winter.
To run or not to run (your pond over winter).
You may choose to keep your pond/water feature running over the winter or shut it right down.
If you are going to keep it running there will be some maintenance involved…
You may need to top up the water from time to time to compensate for evaporation.
You will also have to keep an eye out for ice formations that may cause water to spill over the edges
You will want to maintain a hole in the ice by using an aerator or in-pond pump. A pond de-icer may also be needed.
If you choose to shut it down instead…
Remove the pump from your pond and store it in a warm place. Keeping it in a bucket of water will help prevent the seals from drying out.
Drain the water from your pond's plumbing. If you don’t and the water freezes it will expand and crack your pipes.
Remove the filter media and clean them thoroughly. You can store them somewhere warm along with any UV systems. If you have an ionizer you will also need to remove the head and bring it inside. Be sure to clean off the anodes.
Aerate the water to increase oxygen for your fish and maintain a hole in the surface of the pond, so oxygen can enter and harmful gasses can escape.
In colder climates you may also need a de-icer.
Waterproof & Protect Your Pond With Liquid Rubber NeoPond Sealant
What happens if you don’t waterproof your pond?
Concrete: Water can make its way to the rebar causing corrosion, which will onion/scale and cause spalling, delamination and cracking of the concrete.Concrete ponds are also prone to cracking due to settling, soil heaving, aging and poor construction. Cracks in your concrete pond will result in saturation of the ground around the pond and having to constantly top the pond up (not to mention excessive water bills).
Wood: Due to the cost and ease of construction, wood is used more often than you may think to construct ponds, especially for indoor water features. Create a waterproof surface and protect your wood from rot by coating it with Liquid Rubber NeoPond Sealant.
EPDM Liners: These are easy to install and do a good job if you have a fairly small pond. But if you have larger or more complicated designs you will have seams which are prone to failure. EPDM is also one of the softer pond materials and can tear quite easily compared to other materials. Use Liquid Rubber NeoPond Sealant to repair failed seams and tears and to seal your prond properly.
PVC and HDPE liners: These will do a good job but can become quite brittle in colder temperatures or easily crack if a force is applied to them. Once they do crack, you will want to repair them with Liquid Rubber NeoPond Sealant.
Go to www.shopliquidrubber.com and visit our project pages for more information. You can also email us at support@shopliquidrubber.com or call us at 1-855-592-1049 to talk to one of our technical representatives.]]>
https://shopliquidrubber.com/blogs/news/top-reasons-to-consider-using-a-liquid-rubber-foundation-sealant2022-12-01T16:16:27-05:002024-03-10T20:51:35-04:00Top Reasons to Consider Using a Liquid Rubber Foundation SealantMichael Jon
This blog post will cover some of the top reasons why you might want to consider using Liquid Rubber Foundation Sealant as part of your foundation repair strategy.
]]>
The foundation is the cornerstone of your home. There are many different options and techniques that can be used to seal it and protect your home from water ingress. One of the more popular options is using a Liquid Rubber Foundation Sealant. What follows are some of the top reasons to consider doing so.
To Prevent a Leaking Foundation
One of the main reasons to consider using a liquid rubber foundation sealant is to prevent a potential foundation leak. If you have a leaking foundation, it means that you have a crack or a hole in your foundation that’s allowing water to get inside. Any water inside the foundation can rot wood, rust metal and cause other problems that can be very costly to repair. Sealing your foundation with Liquid Rubber Foundation Sealant in advance can help prevent water penetration through exposure via cracks.
If you already have a leaking foundation, it’s important that you take measures to repair it as quickly as possible. The longer you wait, the more damage will be done. We’ve created a helpful checklist to find and fix foundation cracks that you can reference for even more DIY tips on how to repair a leaking foundation.
You Want to Seal an Unsealed Foundation
If you haven't sealed your foundation yet, Liquid Rubber Foundation Sealant is an excellent choice to prevent water ingress. This is especially important if you have a high water table, or if you have sandy soil that’s more prone to soil movement. It's important to seal your foundation as soon as possible. If you have not sealed yours yet, make sure to have it inspected before you apply any type of sealant for the best results.
Benefits of the Liquid Rubber Foundation Sealant:
Superior strength and durability for a longer-lasting foundation sealant.
900% elongation to withstand expansion and contraction of your foundation over time.
Fast and easy to apply (brush or roller with even strokes and heavy coats).
Quick drying time (takes between 4-8 hours per coat).
Eco-friendly and non-toxic: safe for plants, animals and children.
Prevent Discolored or Mouldy Walls
Another reason to consider using a liquid rubber foundation sealant is to prevent discolored or moldy walls. Mold and discoloration in a wall is the result of water penetration, which means it’s also possible that there’s a leaky pipe that’s causing the wall to be overly damp, or there could be a problem with the foundation.
If there’s a problem with the foundation, it’s possible that the foundation is leaking, which can result in the flooding of your basement and your walls. This can cause the walls, insulation and flooring to retain dampness, and is also the harbinger for mold and mildew. If you do find moldy and or discolored walls, it’s important that you inspect the situation and assess any damage immediately, so that the proper remediation efforts can be taken right away.
You’re Finishing a Drywall Job
If you’re finishing a drywall job, a Liquid Rubber Foundation Sealant can be used to seal off cracks in the foundation, which can provide added peace of mind that your hard work on that drywall job is better protected from moisture. If your home has walls that have been finished and you notice that there are some cracks in the foundation, it's advisable to have your foundation professionally inspected before sealing it to ensure that there are not any other underlying causes.
Using a liquid rubber foundation sealant can make it easier to finish a drywall job by helping to prevent moisture penetration and water ingress. You can also consider painting your basement's walls with Liquid Rubber to add even more protection from water ingress.
Liquid Rubber is the preferred solution for many homeowners and DIY enthusiasts, with easy-to-apply products and video tutorials that help you get the best results. Browse our online catalog to see our products, and easily order all the supplies we've featured here.
 Identifying the Issue